Fixing Up an IBM Model M2 Keyboard
A few weeks ago I picked up a Model M2 keyboard from eBay. I'm not a raving fan of mechanical keyboards but I definitely agree that they are quite nice to type on. I actually got a Das Keyboard Model S Pro years ago but haven't used it recently since it's a Windows keyboard layout and my modern computer is a Mac and I've just grown to hate using Windows keyboard layouts on Mac. But otherwise, it's quite nice and I wouldn't hesitate to recommend a Das Keyboard to anyone. Unicomp also makes apparently very nice mechanical keyboards along the style of the original IBM keyboards but I've not tried these personally.
At any rate, I picked up this Model M2 to use with my "retro" computers. Not really for any particular reason other then it feels era-appropriate and is a nice relatively compact buckling spring keyboard. Many more people would prefer the original Model M over this, but I've always been put off on getting one of those due to the bulky size.
The Model M2 is infamous for having bad capacitors. The two capacitors on the controller inside will apparently go bad (dry out) quicker if unused for long periods of time, so even a brand-new-in-box M2 keyboard isn't guaranteed to work.
And as if bad capacitors weren't bad enough, the M2 is also infamous for being difficult to take apart and to reassemble (probably harder to reassemble then to disassemble I think). Apart from two screws on the bottom, the majority of the keyboard is held together by somewhat easy-to-break plastic clips internally that need to be very carefully opened. Oh boy.
It should be noted that not all Model M2 keyboards are mechanical. Certain ones made by Lexmark with a model number beginning with '7' are rubber dome. But otherwise from the outside they look identical.
This one I got arrived and initially didn't work when I plugged it in to give it a try it. It gave the tell-tale sign of bad capacitors where only two LED lights flashed on and stayed on and no key-presses were ever registered. However I noticed that by unplugging it and replugging it in that it worked perfectly. I continued using it for a couple weeks like this and all was good, but I knew that this wasn't a long-term solution and that I really did need to go and replace the capacitors.
Onwards to disassembling!
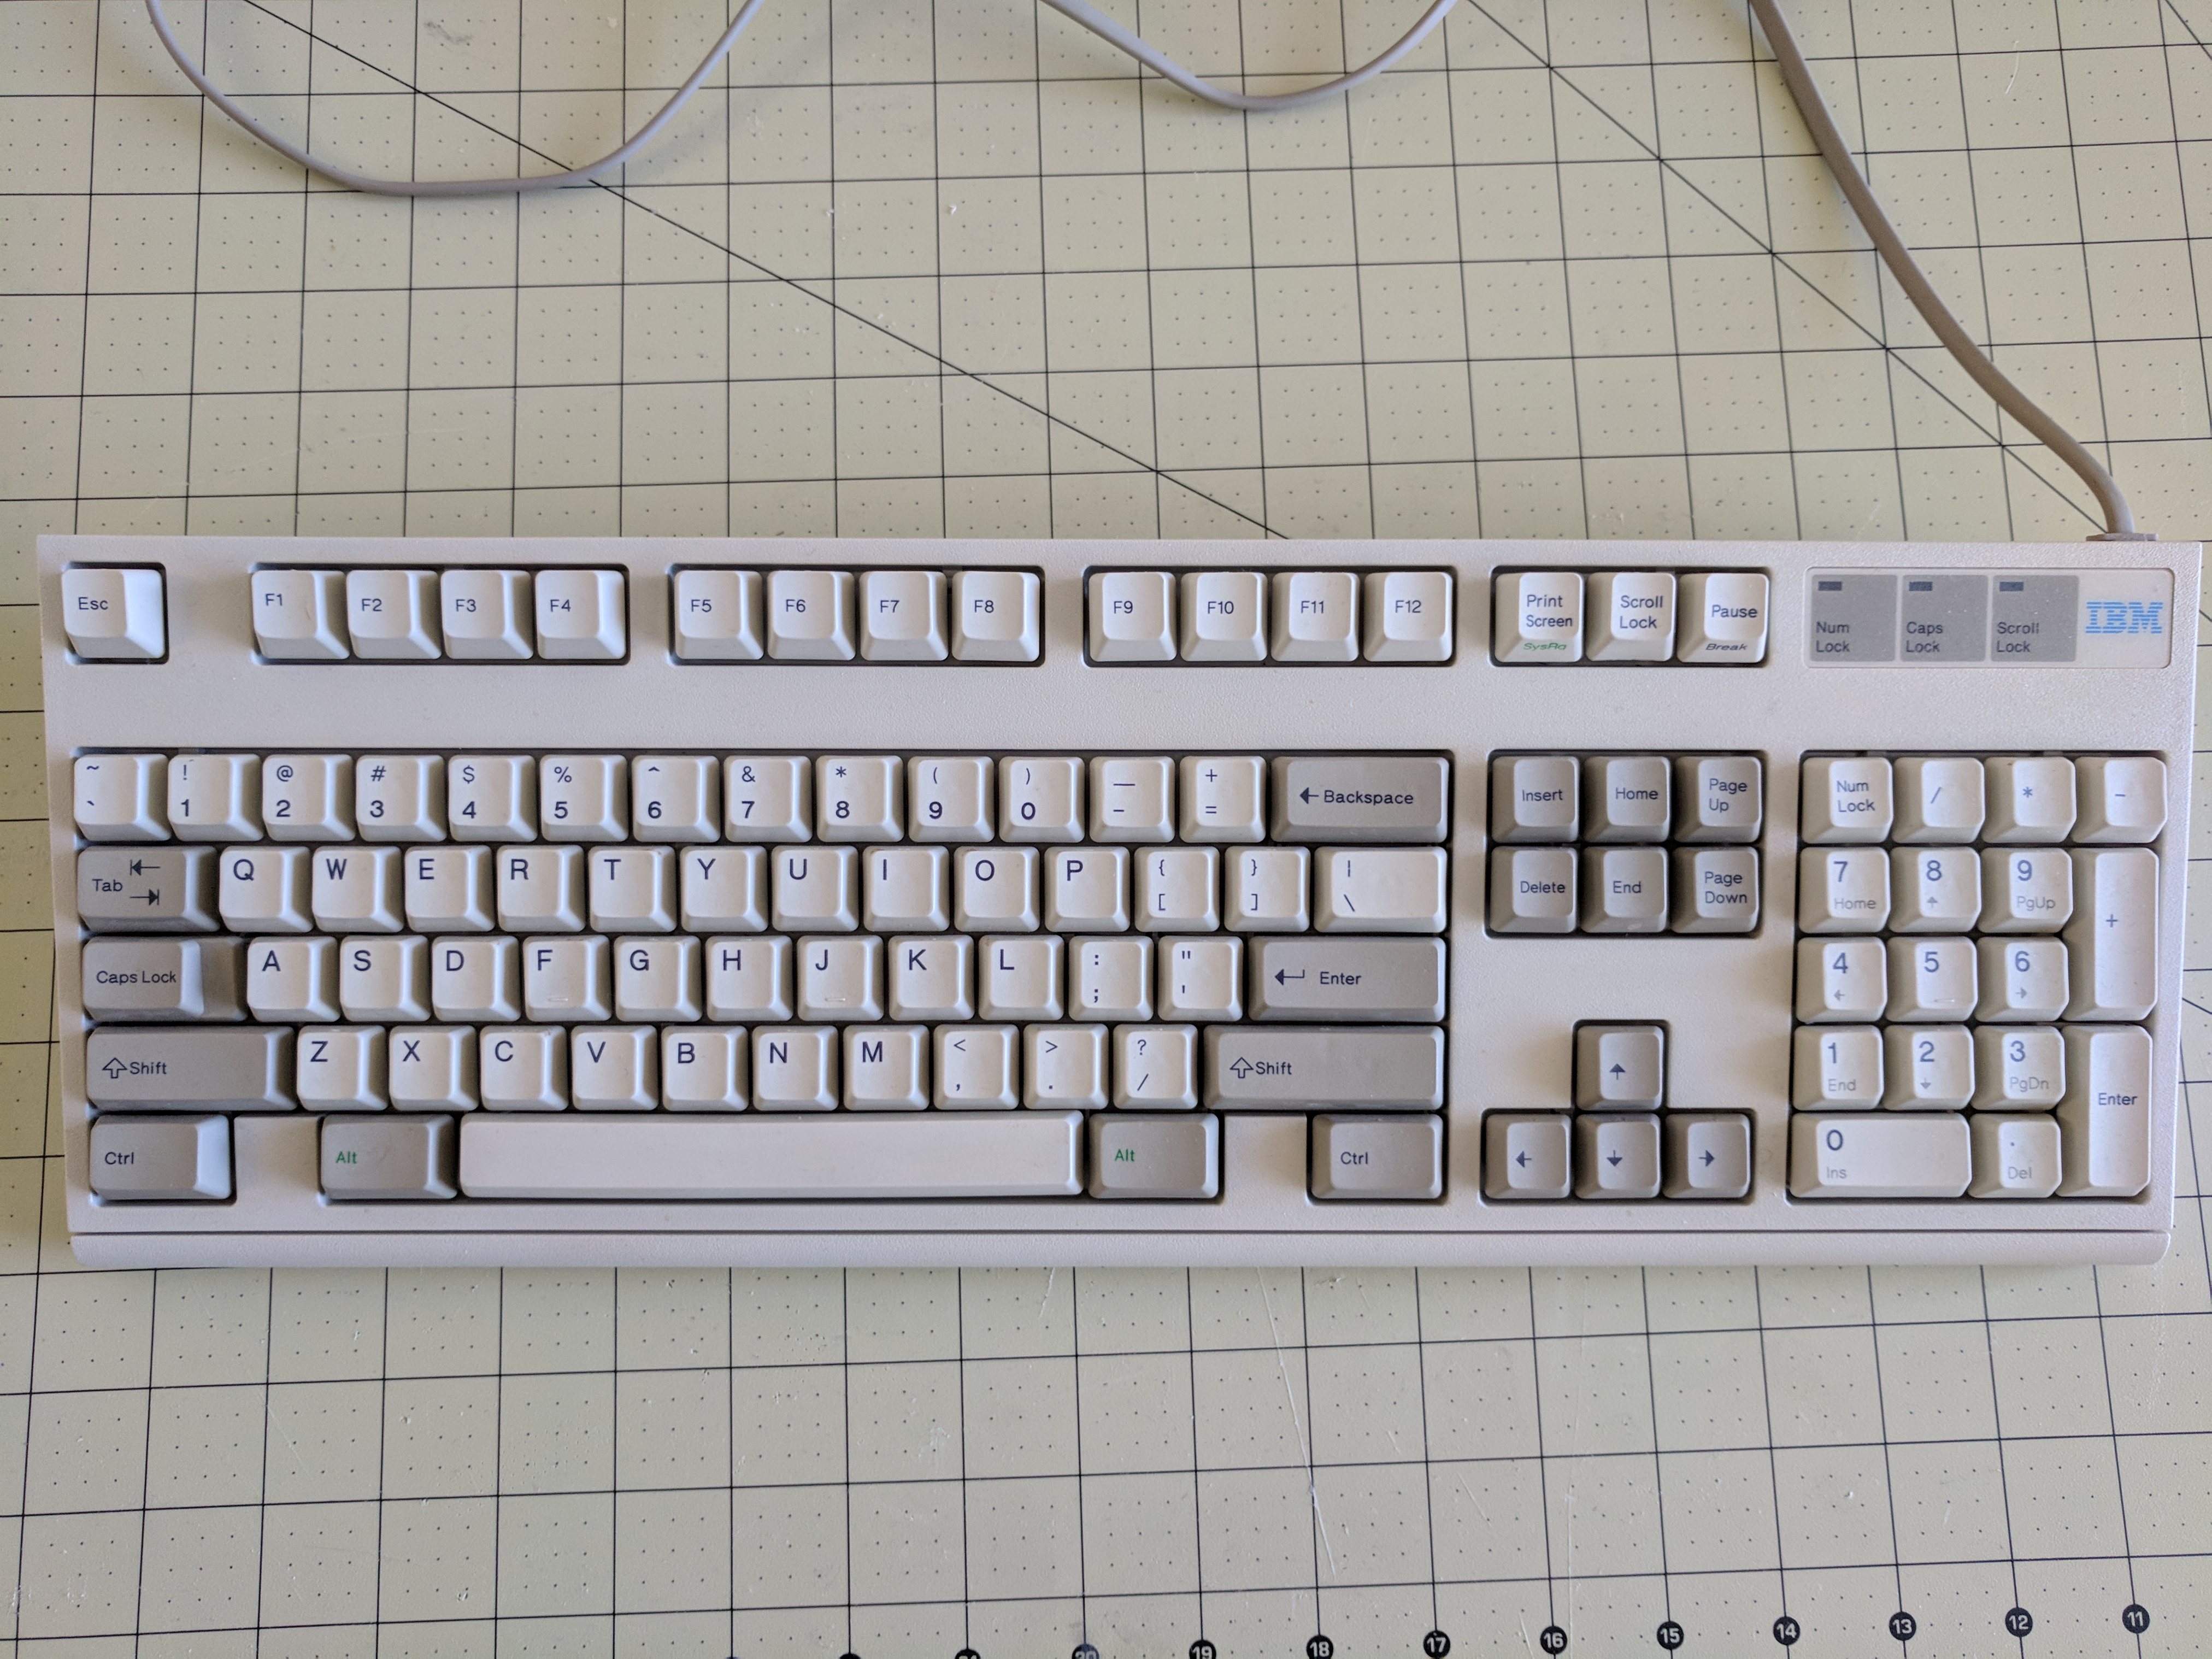
First thing is first. Take a picture of the keyboard before you take anything apart. This is so you can use it as a reference for where the keys all go when you're putting it back together.
To begin, the keycaps all need to be removed. This is because the aforementioned plastic clips that hold the keyboard together are underneath the keycaps. And you'll probably want to clean the keycaps anyway. Mine actually weren't that dirty as you can see from the above photo, but I still cleaned them anyway.
Removing the keycaps is really simple. You can use any thin flat tool to pop them off. I began by popping off all of the square keys. A number of the longer keys such as Backspace, Enter and the space bar have additional little brackets that attach to the bottom that need some extra care, so it's best to save these for last.


With keys like Enter shown above, I found it easiest to pop up the keycap first in the same exact way as I'd done for every other square key, but before trying to lift it off completely, you take a some dull flat/thin tool and press down the bar so you can easily slide it out. It's very easy, but you do need to be careful as the plastic that holds the whole bracket to the keycap is very thin and easy to break!
The space bar is a little bit different then all the other keys. Again, I started by popping it up in the same way as the other keys, but again, before trying to lift it off, you need to release the bracket. This one is different then the other brackets and is held down by two little bars that need to be pushed out. You push the left one out to the left and the right one gets pushed out to the right. Use a dull, flat, thin tool again to push them out. They are a little tough to push out, but once you get the first one the second one is easy. Again, be very careful as the plastic is thin and easy to break!
Now the keycaps are all removed.
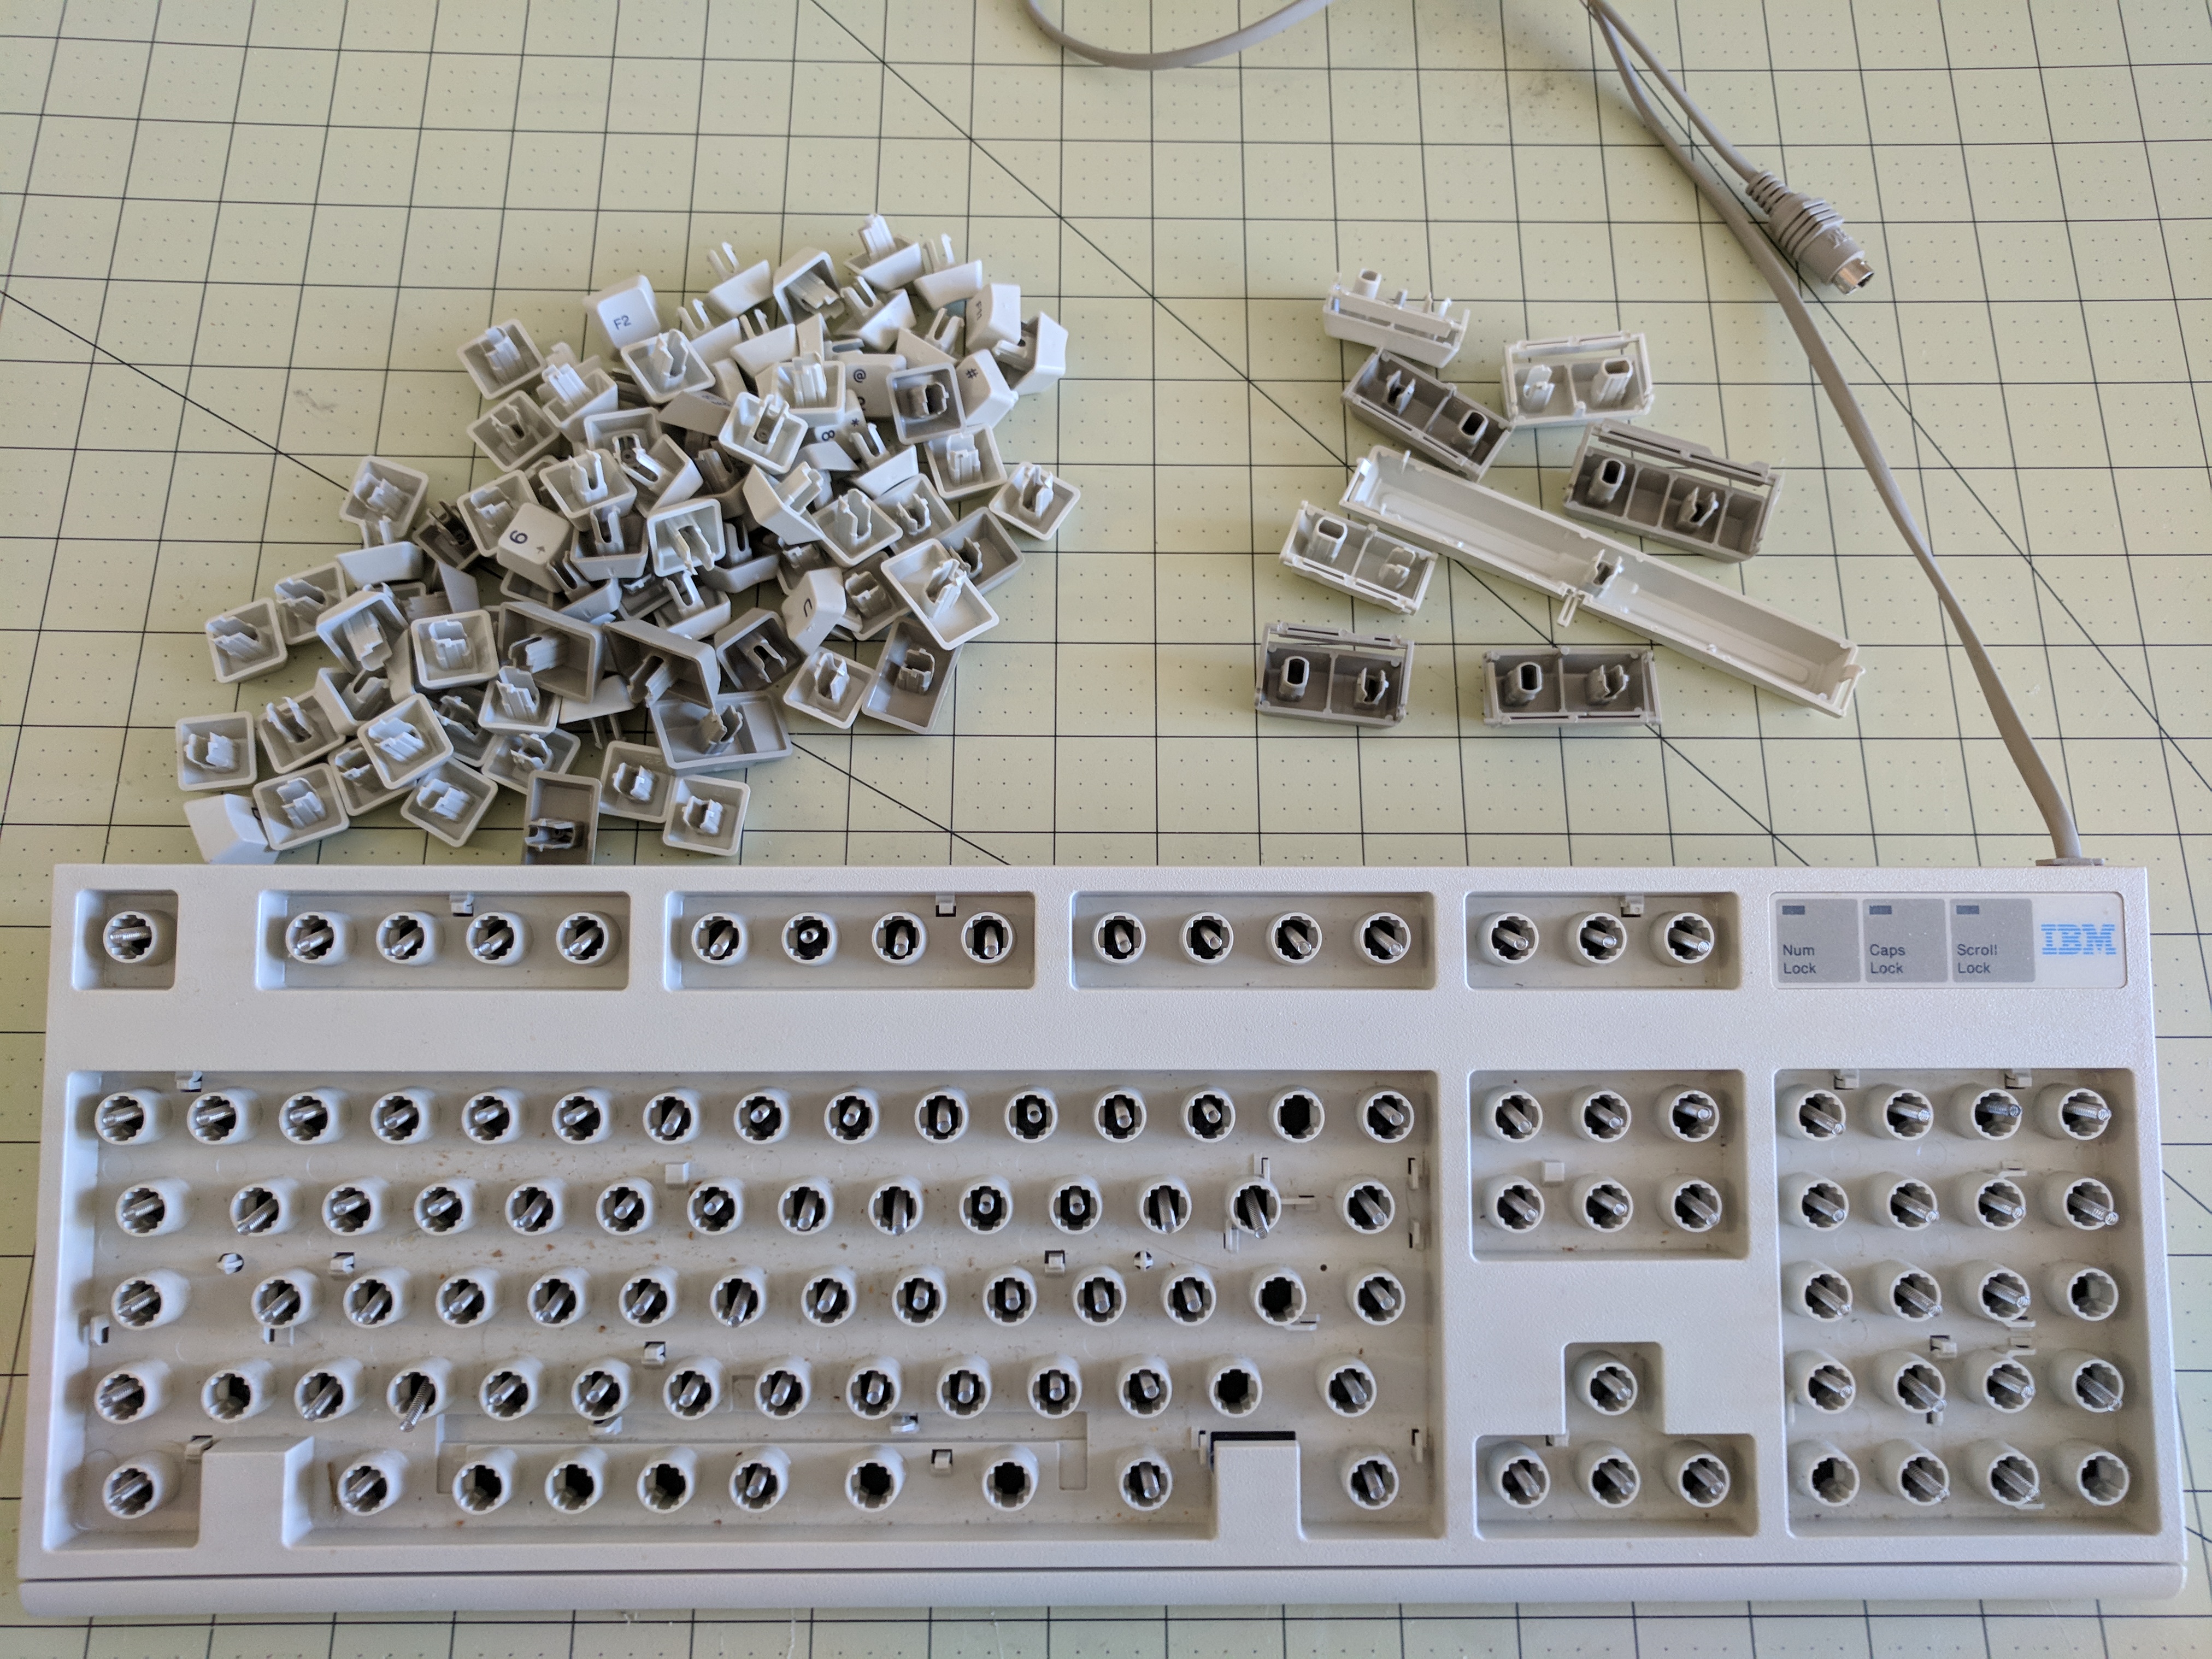
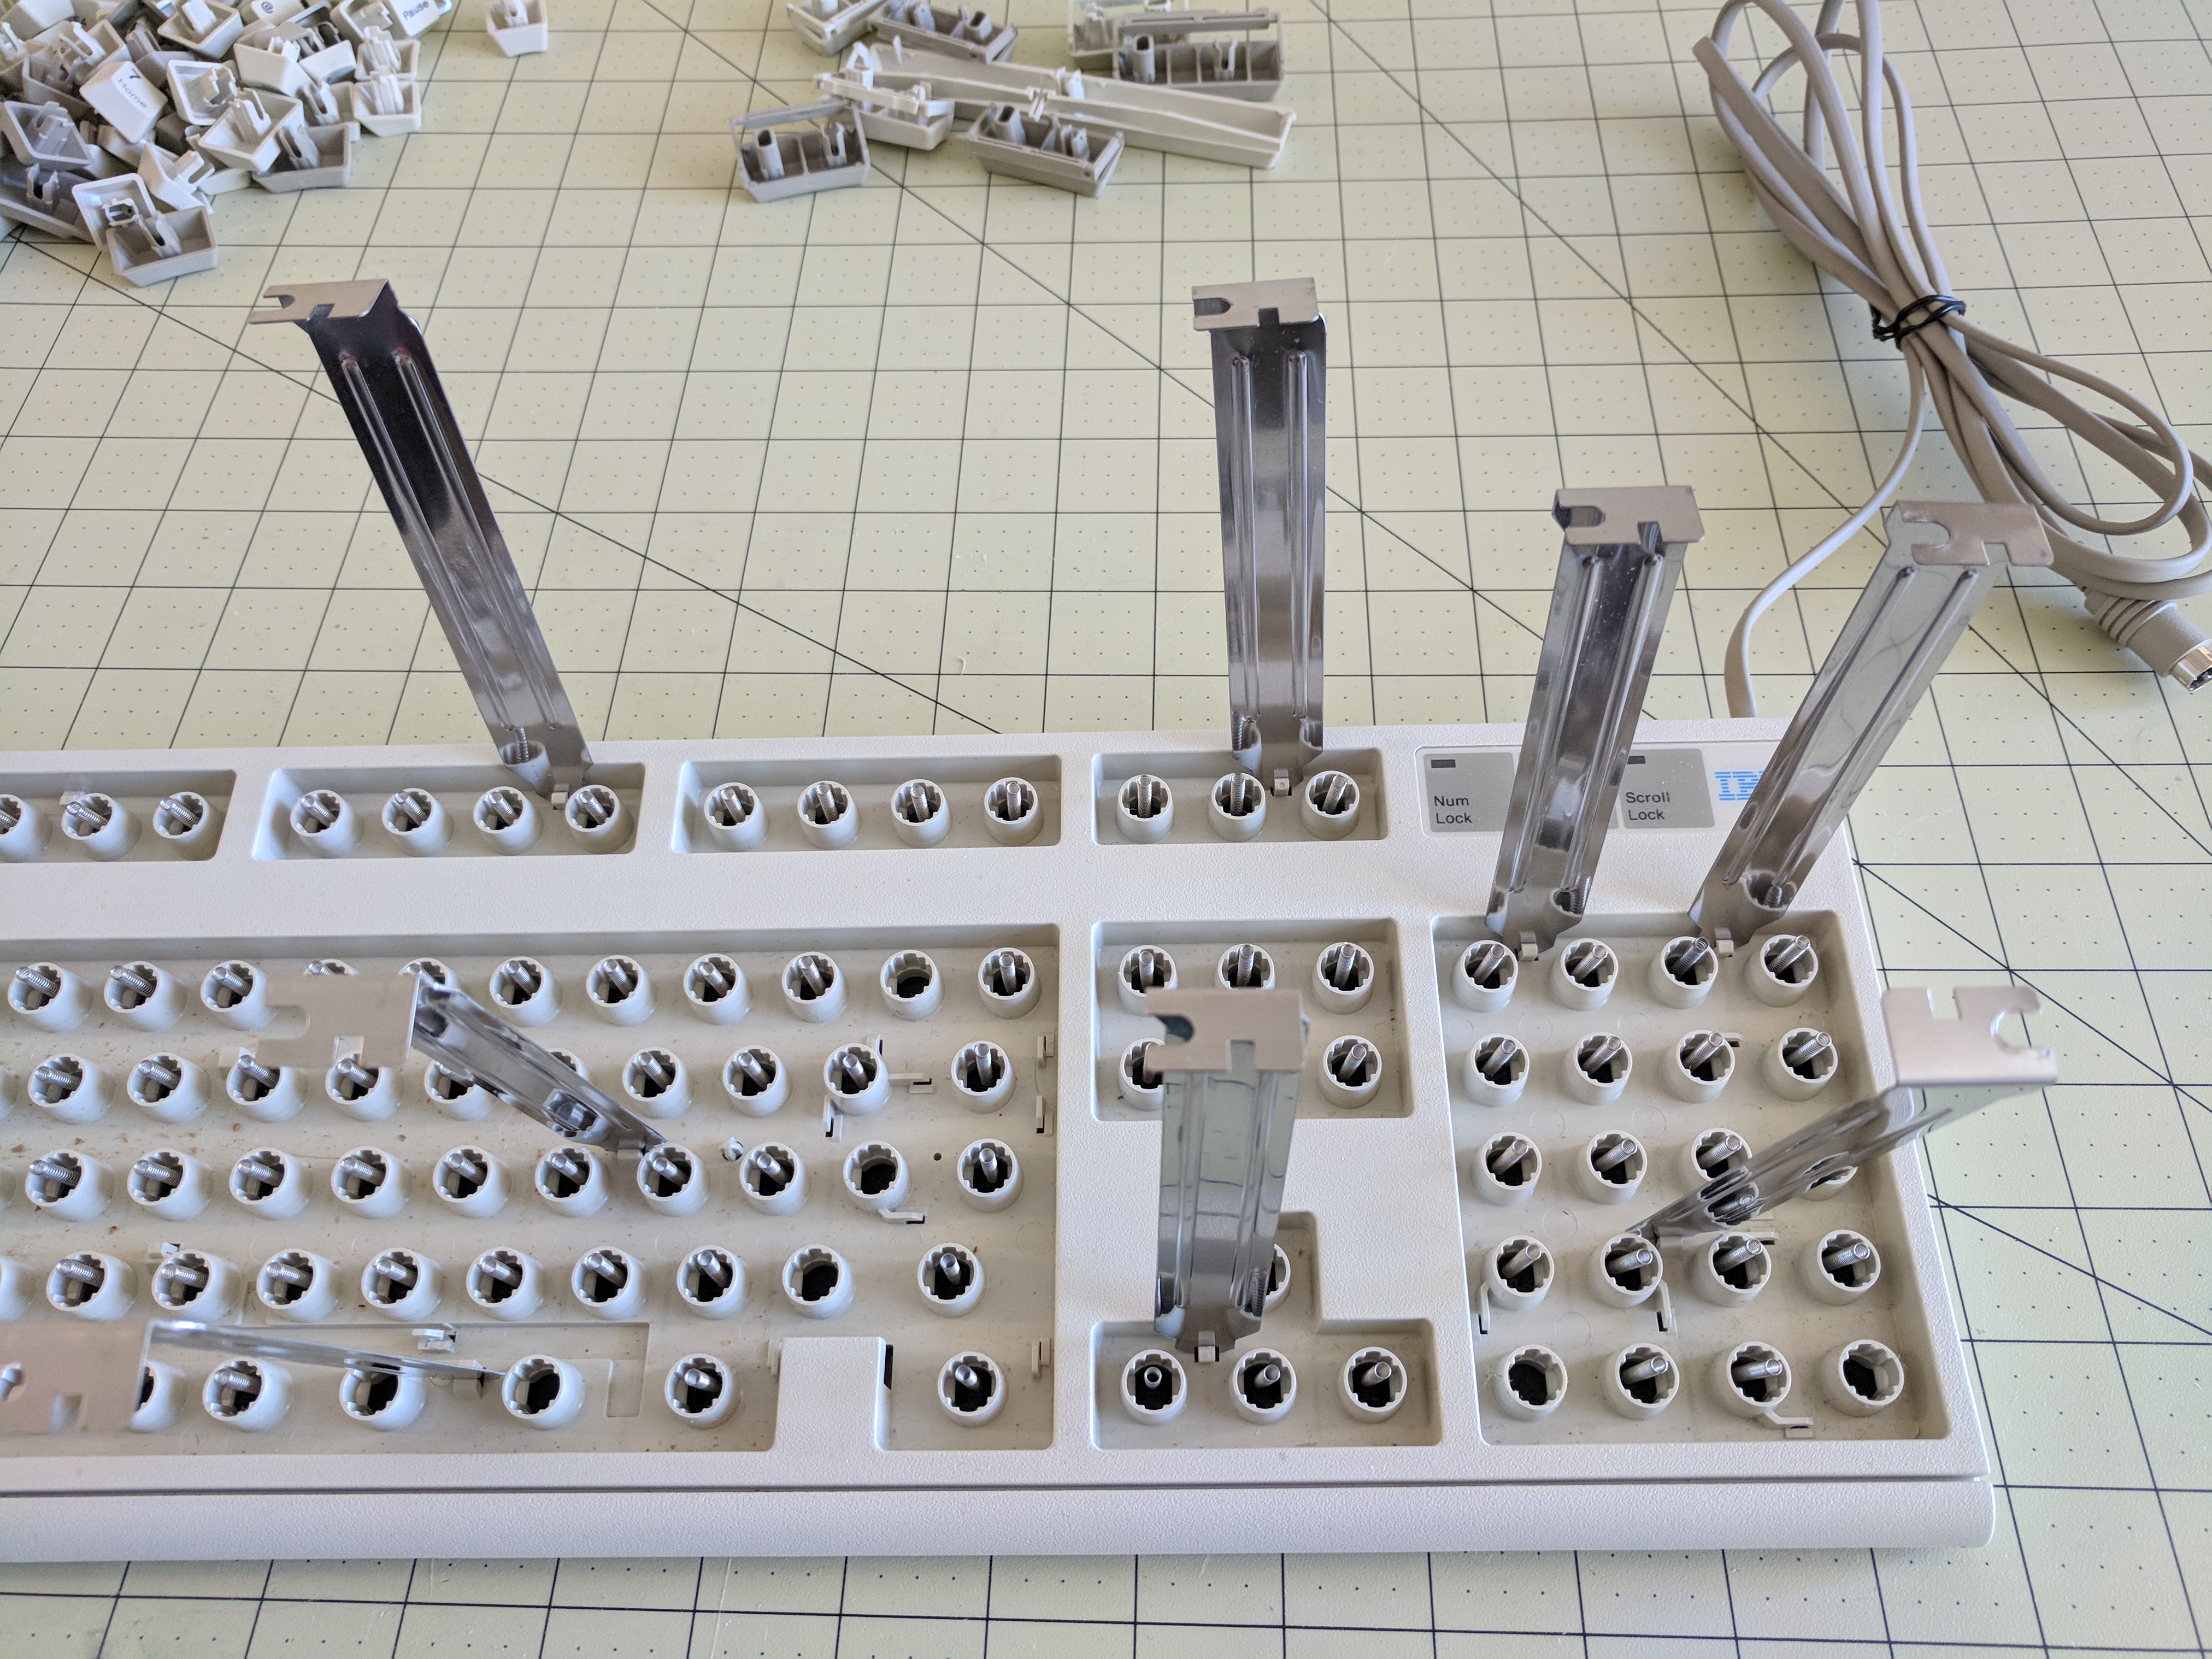
At this point, you'll want to take another picture. This is important because as you can see, not all of the holes have springs in them! All of the missing springs are the extra holes that are covered by the longer keys which all only need one spring each just like the smaller square keys.
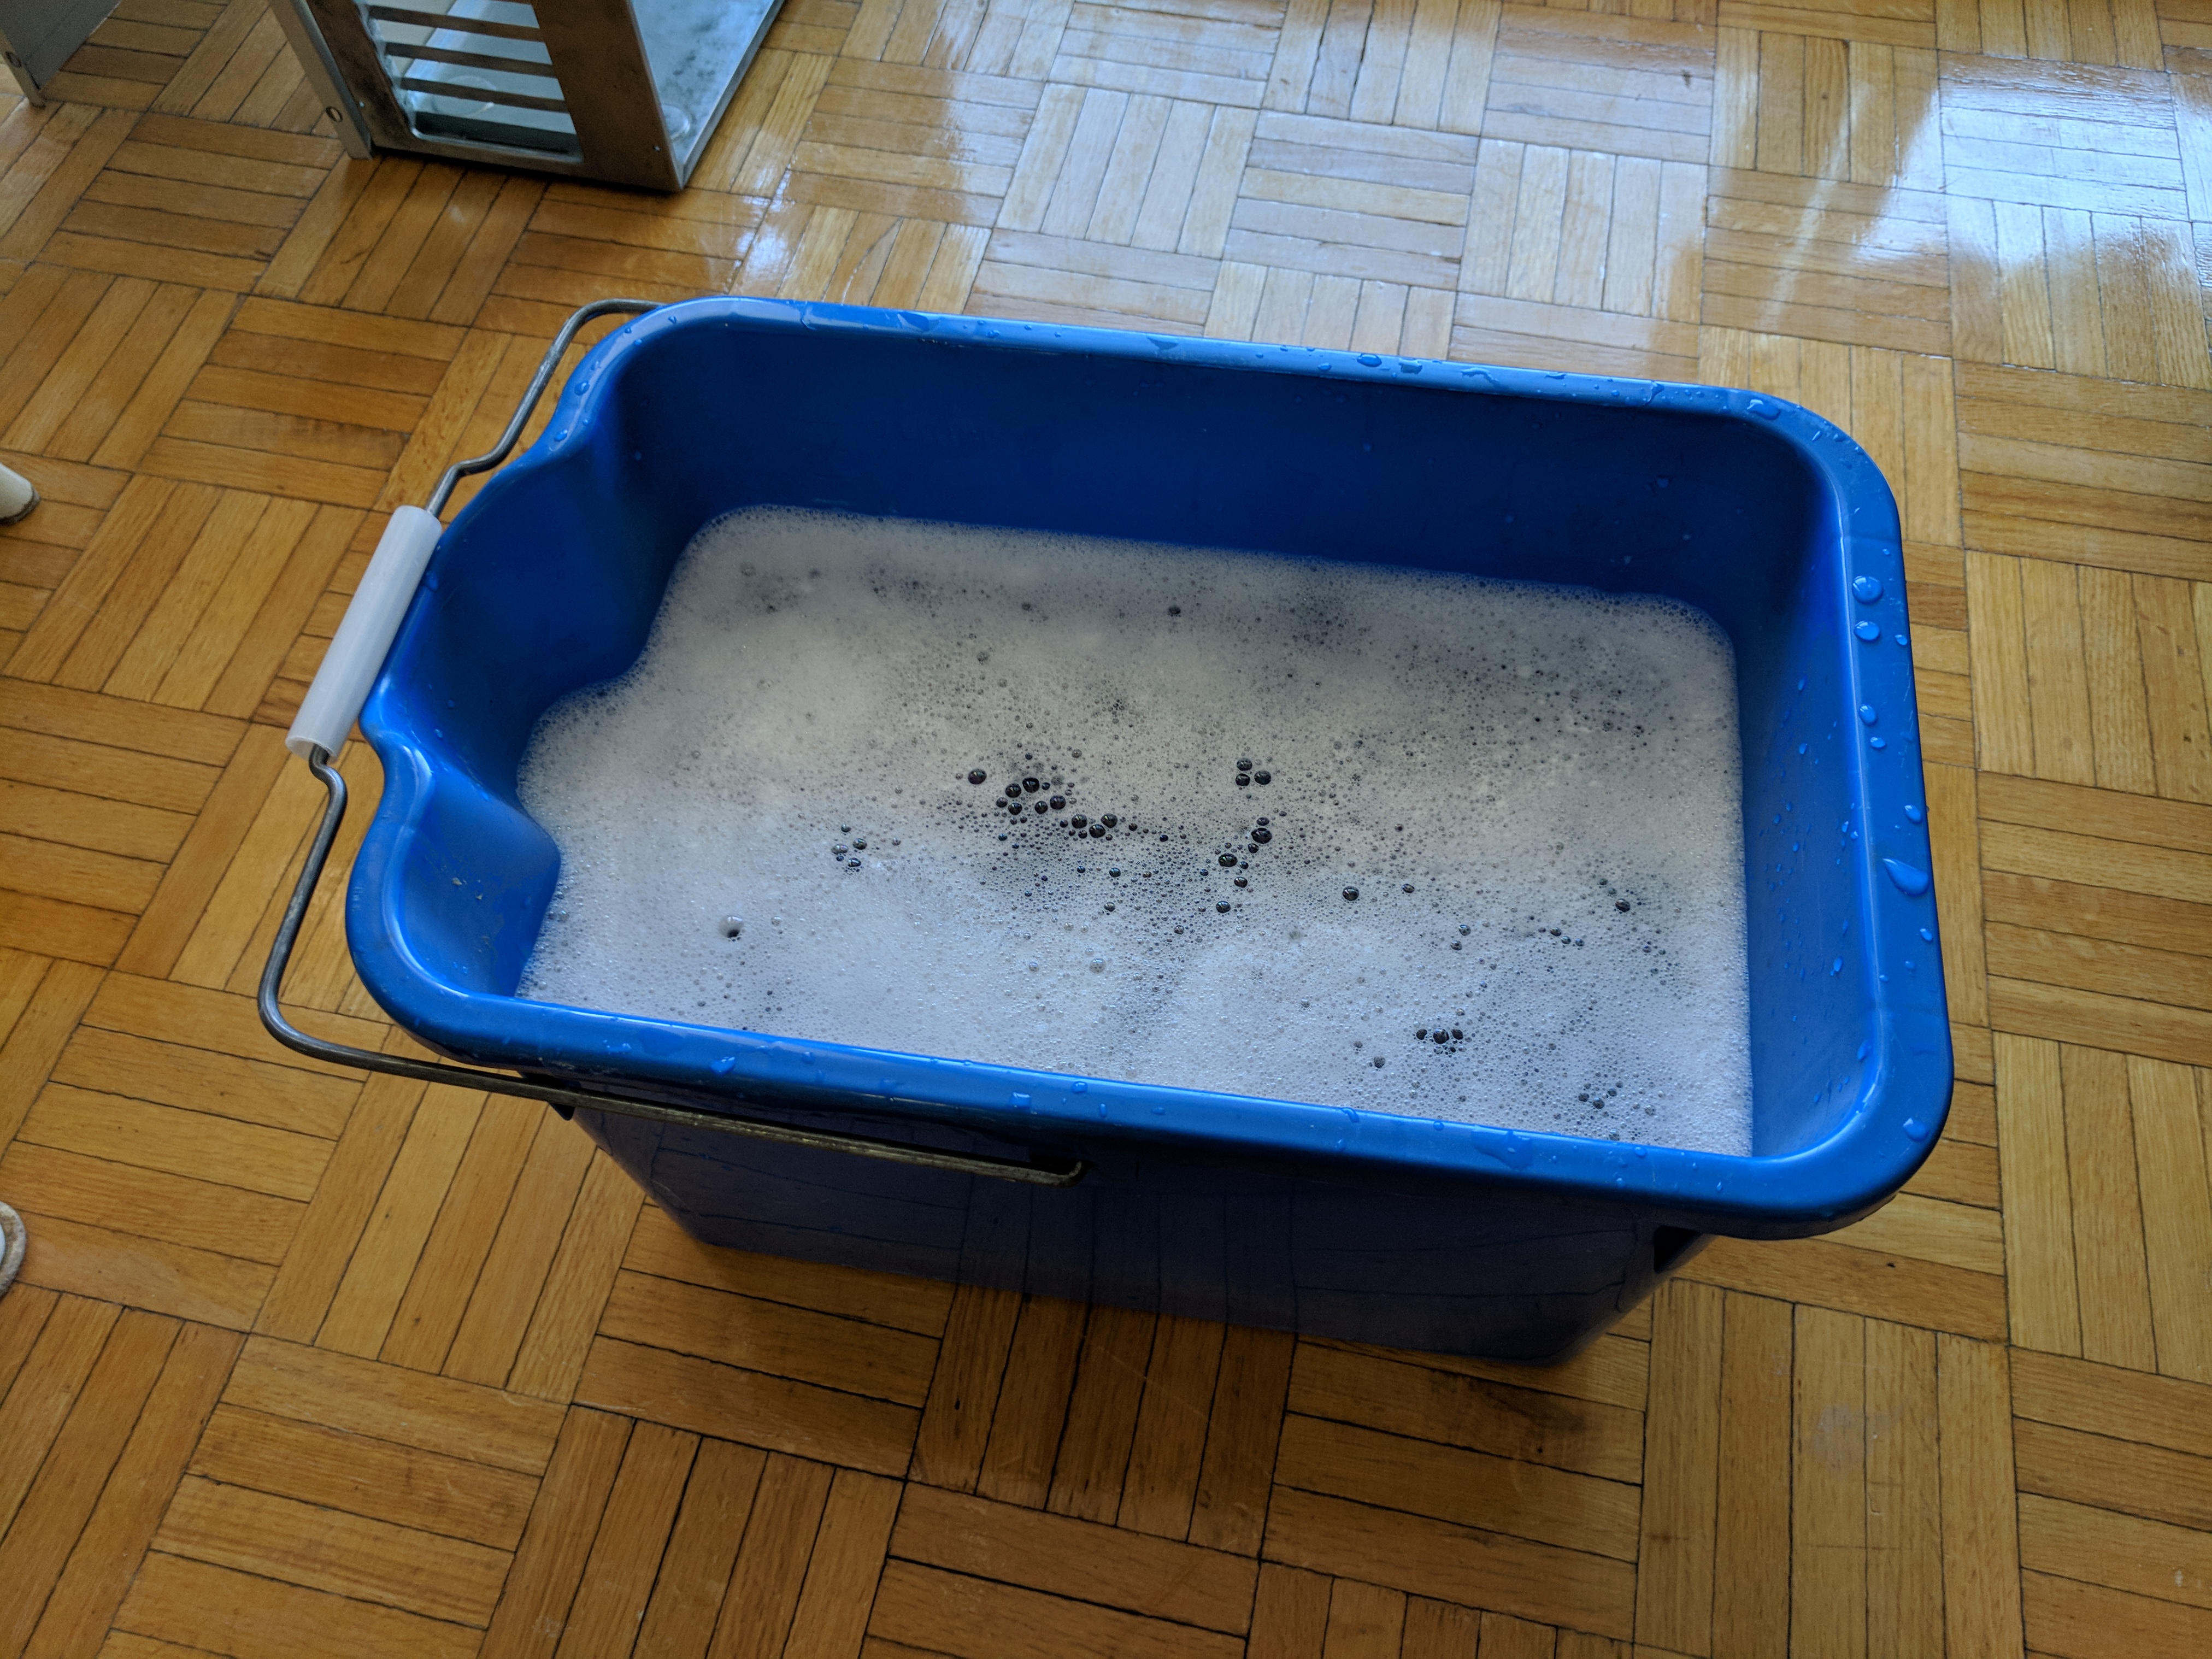
If you're cleaning the keycaps, get some soapy water ready and let them soak for a good hour before doing any scrubbing. That'll give you plenty of time to do the rest of the disassembly and maybe even get the capacitors replaced too depending on how things go.
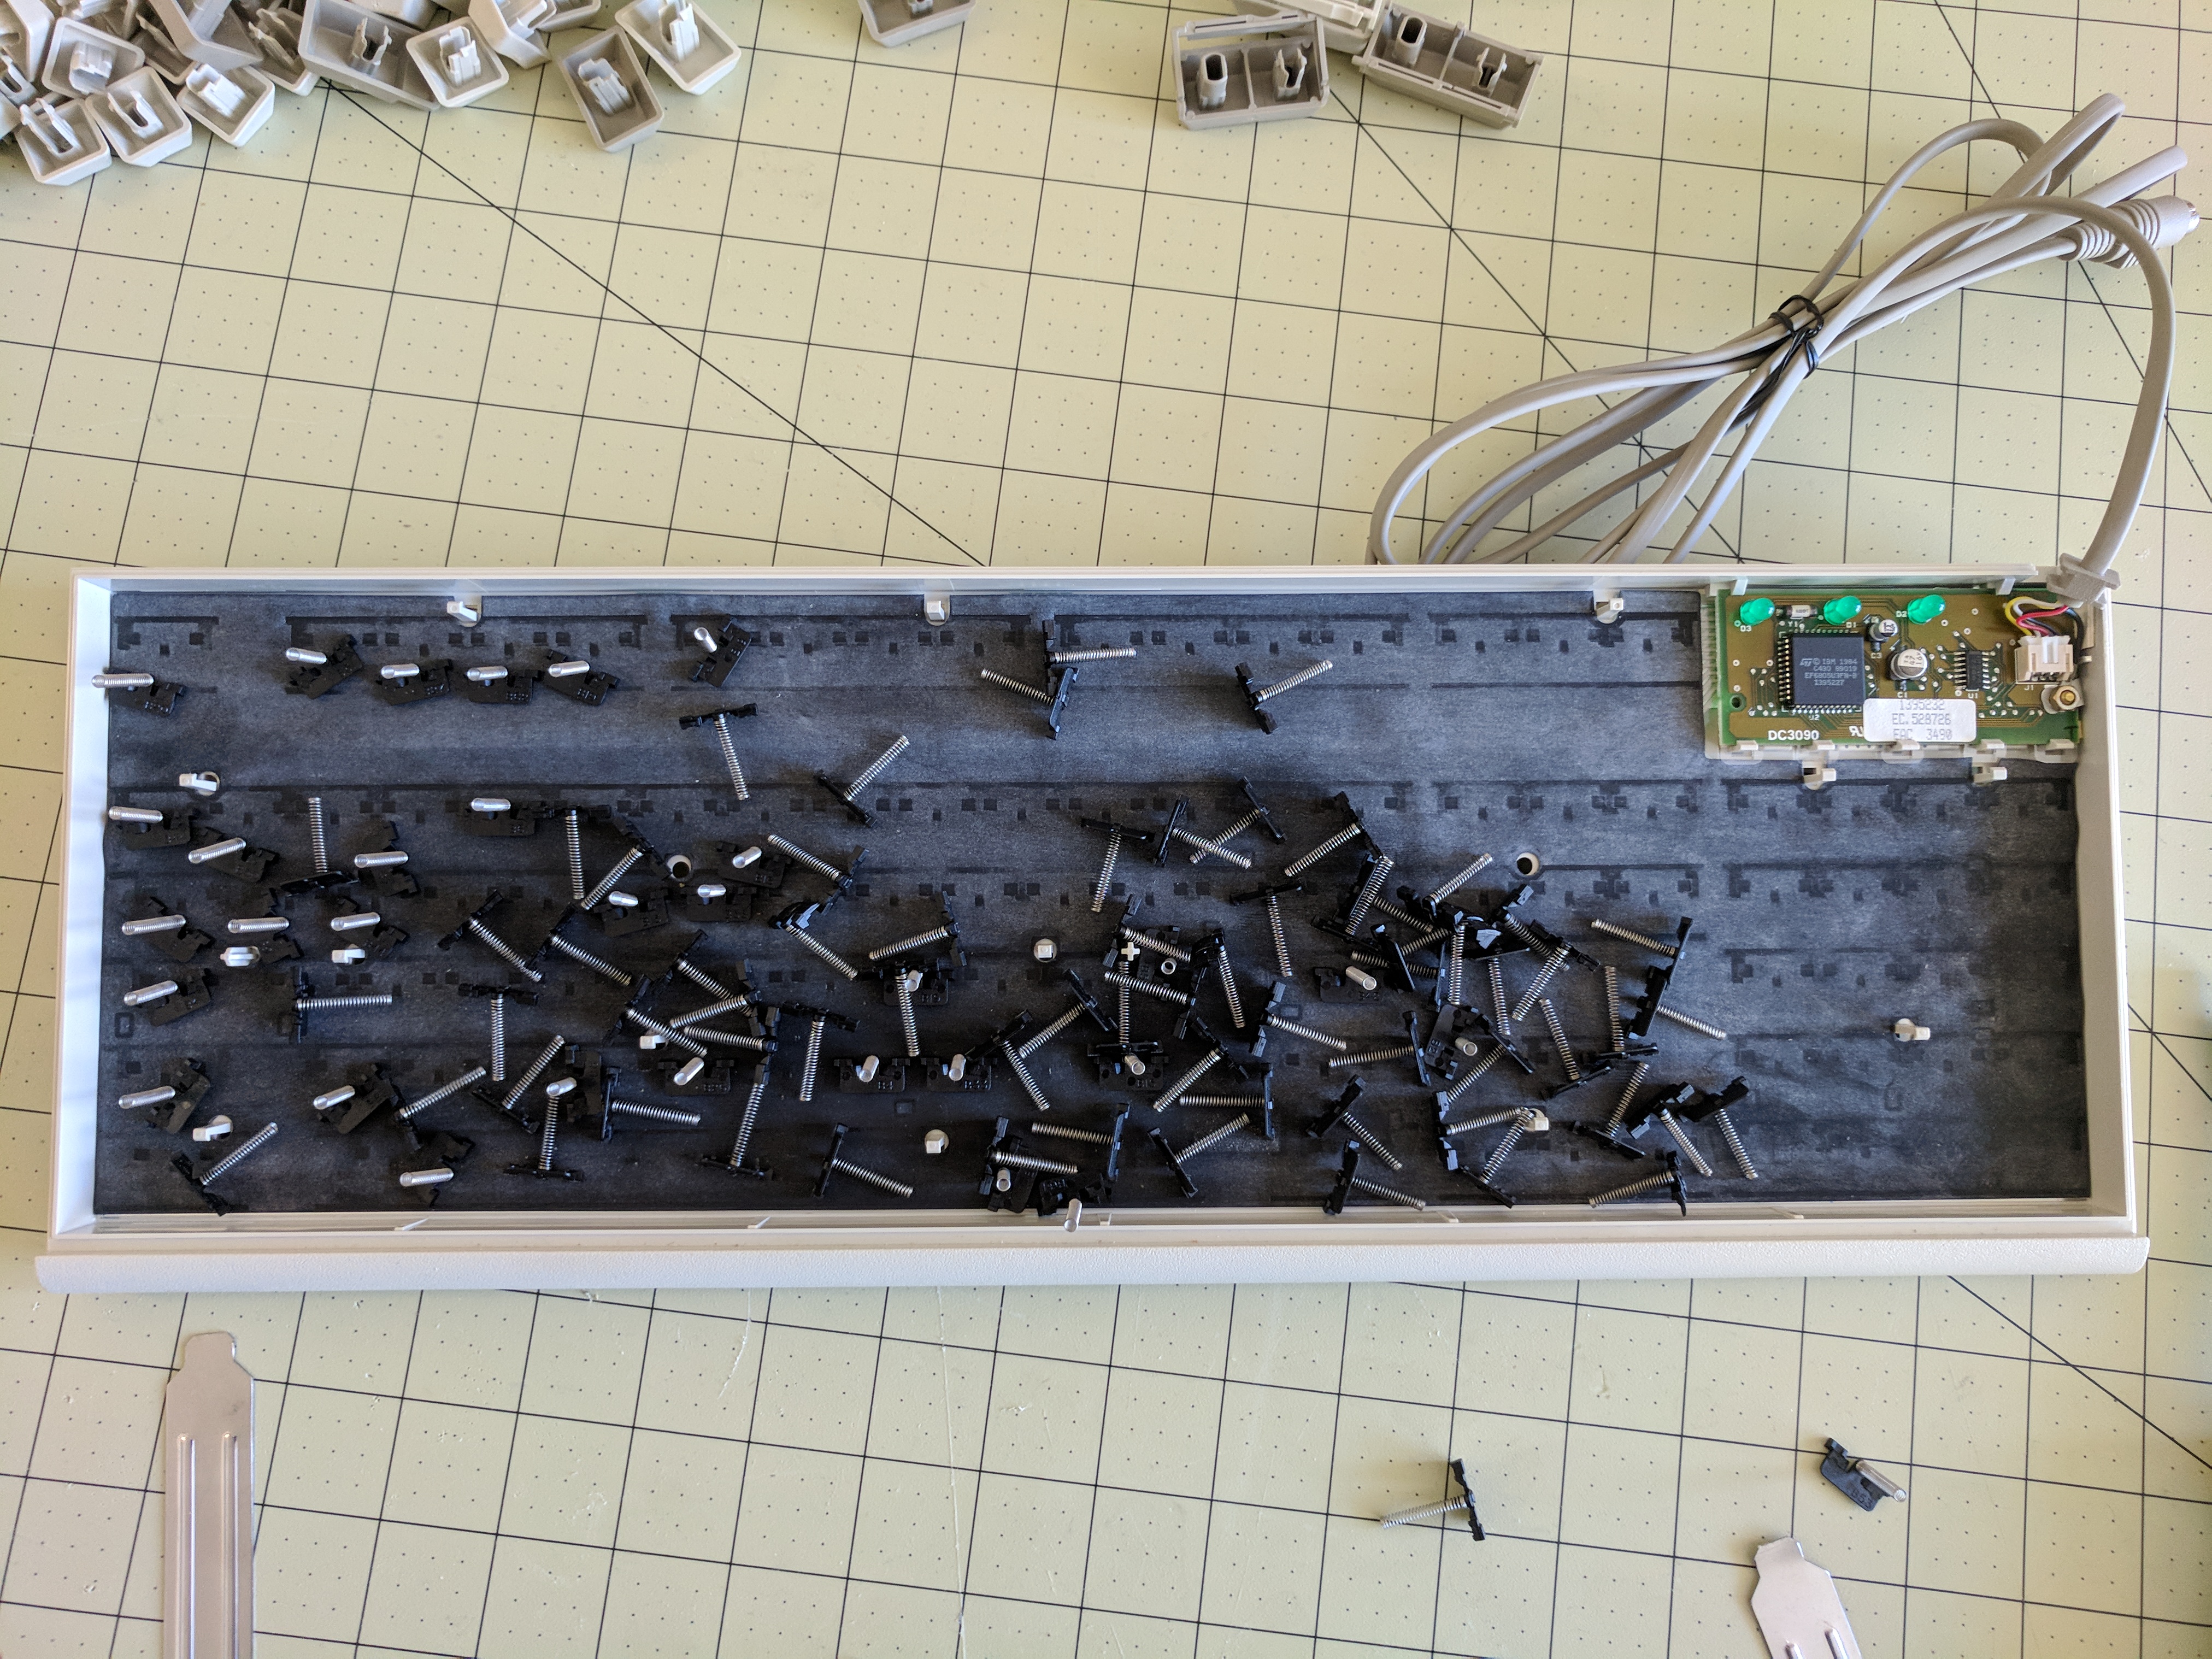
As you'll be able to see in the above picture of the keyboard without the keycaps on, there are 13 small plastic clips that need to be separated to remove the top plastic half of the keyboard. You again use your dull, flat and thin tool to separate the two plastic parts of the clip, but I found that they would not stay separated and trying to push down to move the other half of the clip lower so it would not reattach was tricky and not guaranteed. The whole plastic of the keyboard is somewhat flexible so if I got one clip to stay separated, once I picked up the keyboard there was a very good chance the whole thing would flex a tiny bit and the clip would somehow find its way back and snap together again. Super frustrating!
So, I figured I needed something to wedge many of the clips apart while I pried off the top plastic cover on the keyboard. Not having much in my apartment to use for wedging, I turned to my little stack of spare computer expansion slot/bay covers. This actually worked much better than expected and I was able to turn the keyboard on it's side to begin prying it apart with the confidence that the clips would stay apart.

If you decide to go this route, whatever you use as a wedge should really be thin and hard (so as not to bend/flex while wedged in the clip). A very common complaint about these keyboards is the ease with which these plastic clips break, so you really don't want to flex them more then you have to!
As you can see in the photo on the right, you need to pry apart the top and bottom halves of the keyboard from the side. I started from the bottom and once I got it apart enough, used my finger nails to keep it apart while I worked on the top half. Eventually got it open enough to fit the tool I was using in. By this point, the expansion slot cover wedges that were closest to where I was opening the keyboard from were falling out, as expected, since there was nothing to hold them there once I started opening it.
I only had enough wedges for half the keyboard, so once I had it open enough so that the first 5 of the wedges had fallen out, I used my tool as a bigger wedge and left it placed between the two halves of the keyboard, set the whole keyboard back down and re-used those expansion slot cover as wedges, placing them into the remaining plastic clips on the opposite side of the keyboard. At this point, all of the plastic clips were either already apart or had a wedge in them and I was simply able to somewhat gently but firmly pull apart the top and bottom plastic halves of the keyboard as if I was slowly and carefully opening a book.
Luckily for me, I did not end up breaking a single plastic clip in the process! Hooray! Even if you broke a couple clips, it's not the end of the world. Hopefully though you don't break too many. If that does happen I imagine you could probably use a bit of hot glue to put them back in place.
I should point out that all the while you will probably notice and hear/see the buckling springs inside falling out of their place. Don't worry about this, but definitely do not try to close the keyboard again at this point else you'll probably squish and ruin some of these springs after they've been freely moving about inside. Just keep going with opening the keyboard and it'll all be fine.
Take all of the springs and carefully place them someplace safe for now, out of the way. We won't need them until we begin reassembly. You should also carefully peel up the thin black sheet/mat that the springs were sitting on. You can clean this if you like. I just brushed it off lightly with a dry cloth and then set it aside.
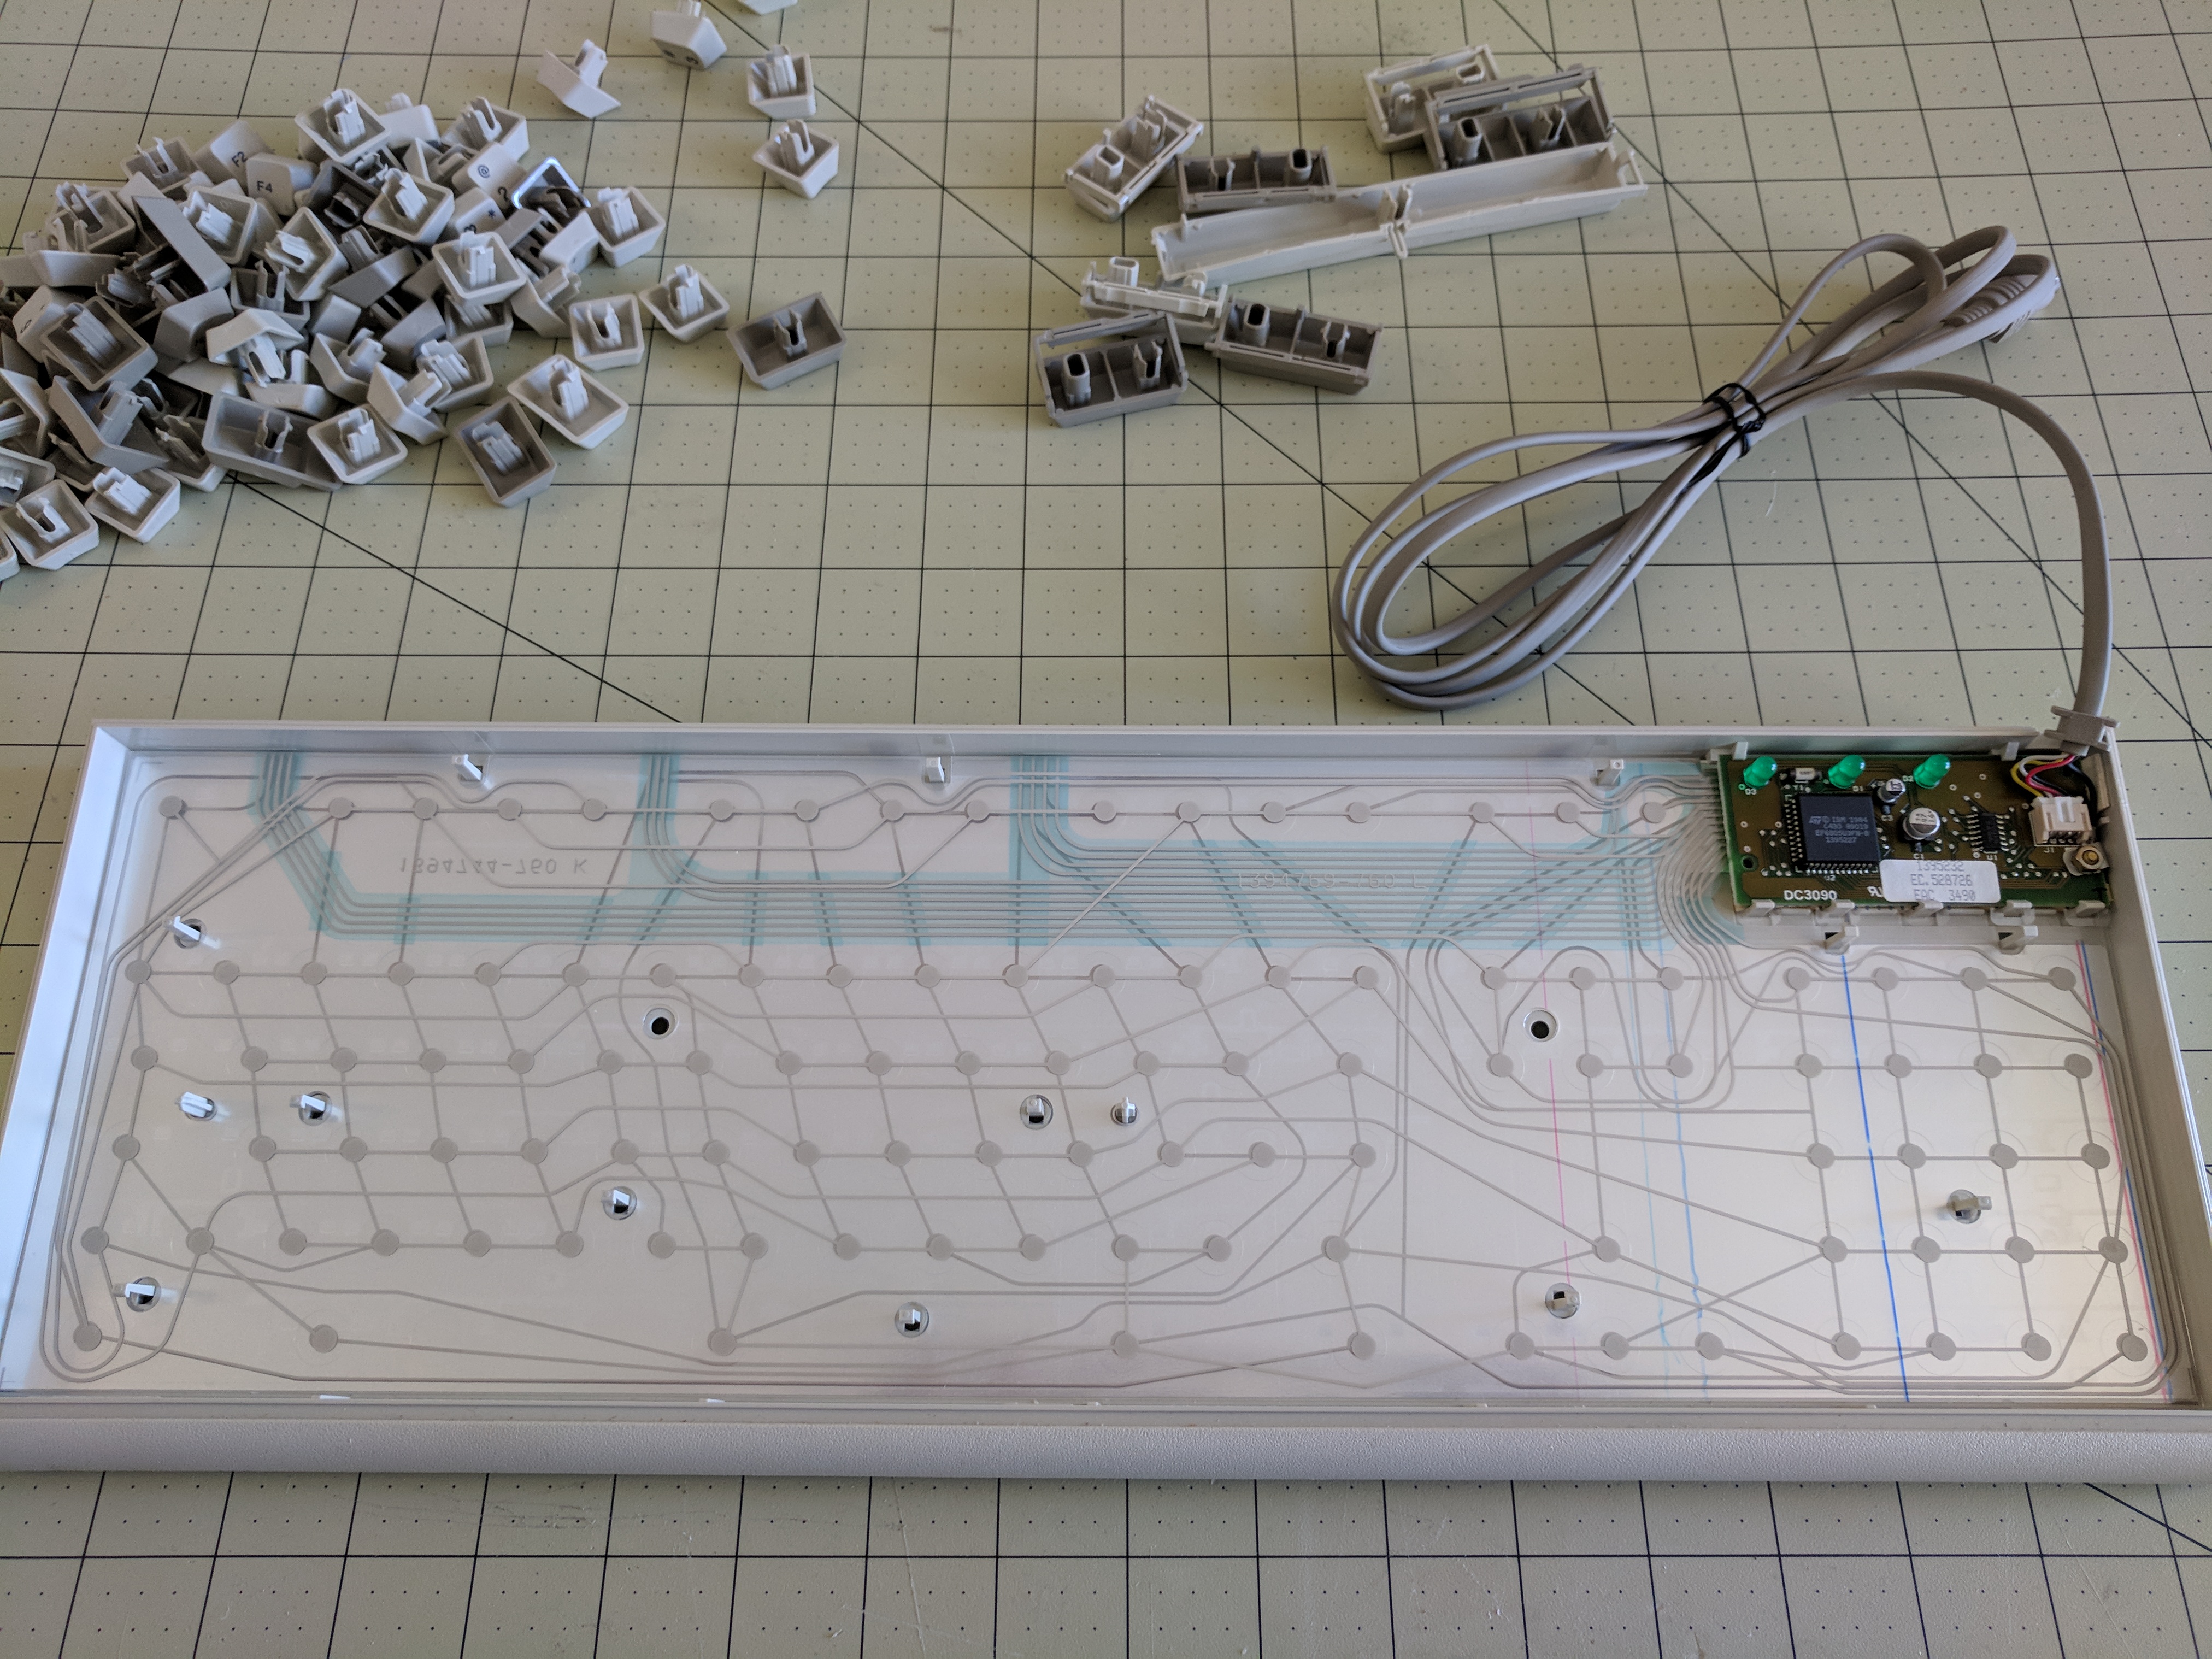

Some people report finding that the traces on the membranes corrode and go black or dark brown or whatever. As you can see, I didn't have that problem. Not sure what people do to fix that problem so unfortunately I cannot advise there. I would not recommend removing any of these membranes if you don't see any problems on any of the traces. It looks like it would be tricky to get them all back perfectly aligned and I've read comments from people saying as much. Just leave them as they are if you can.
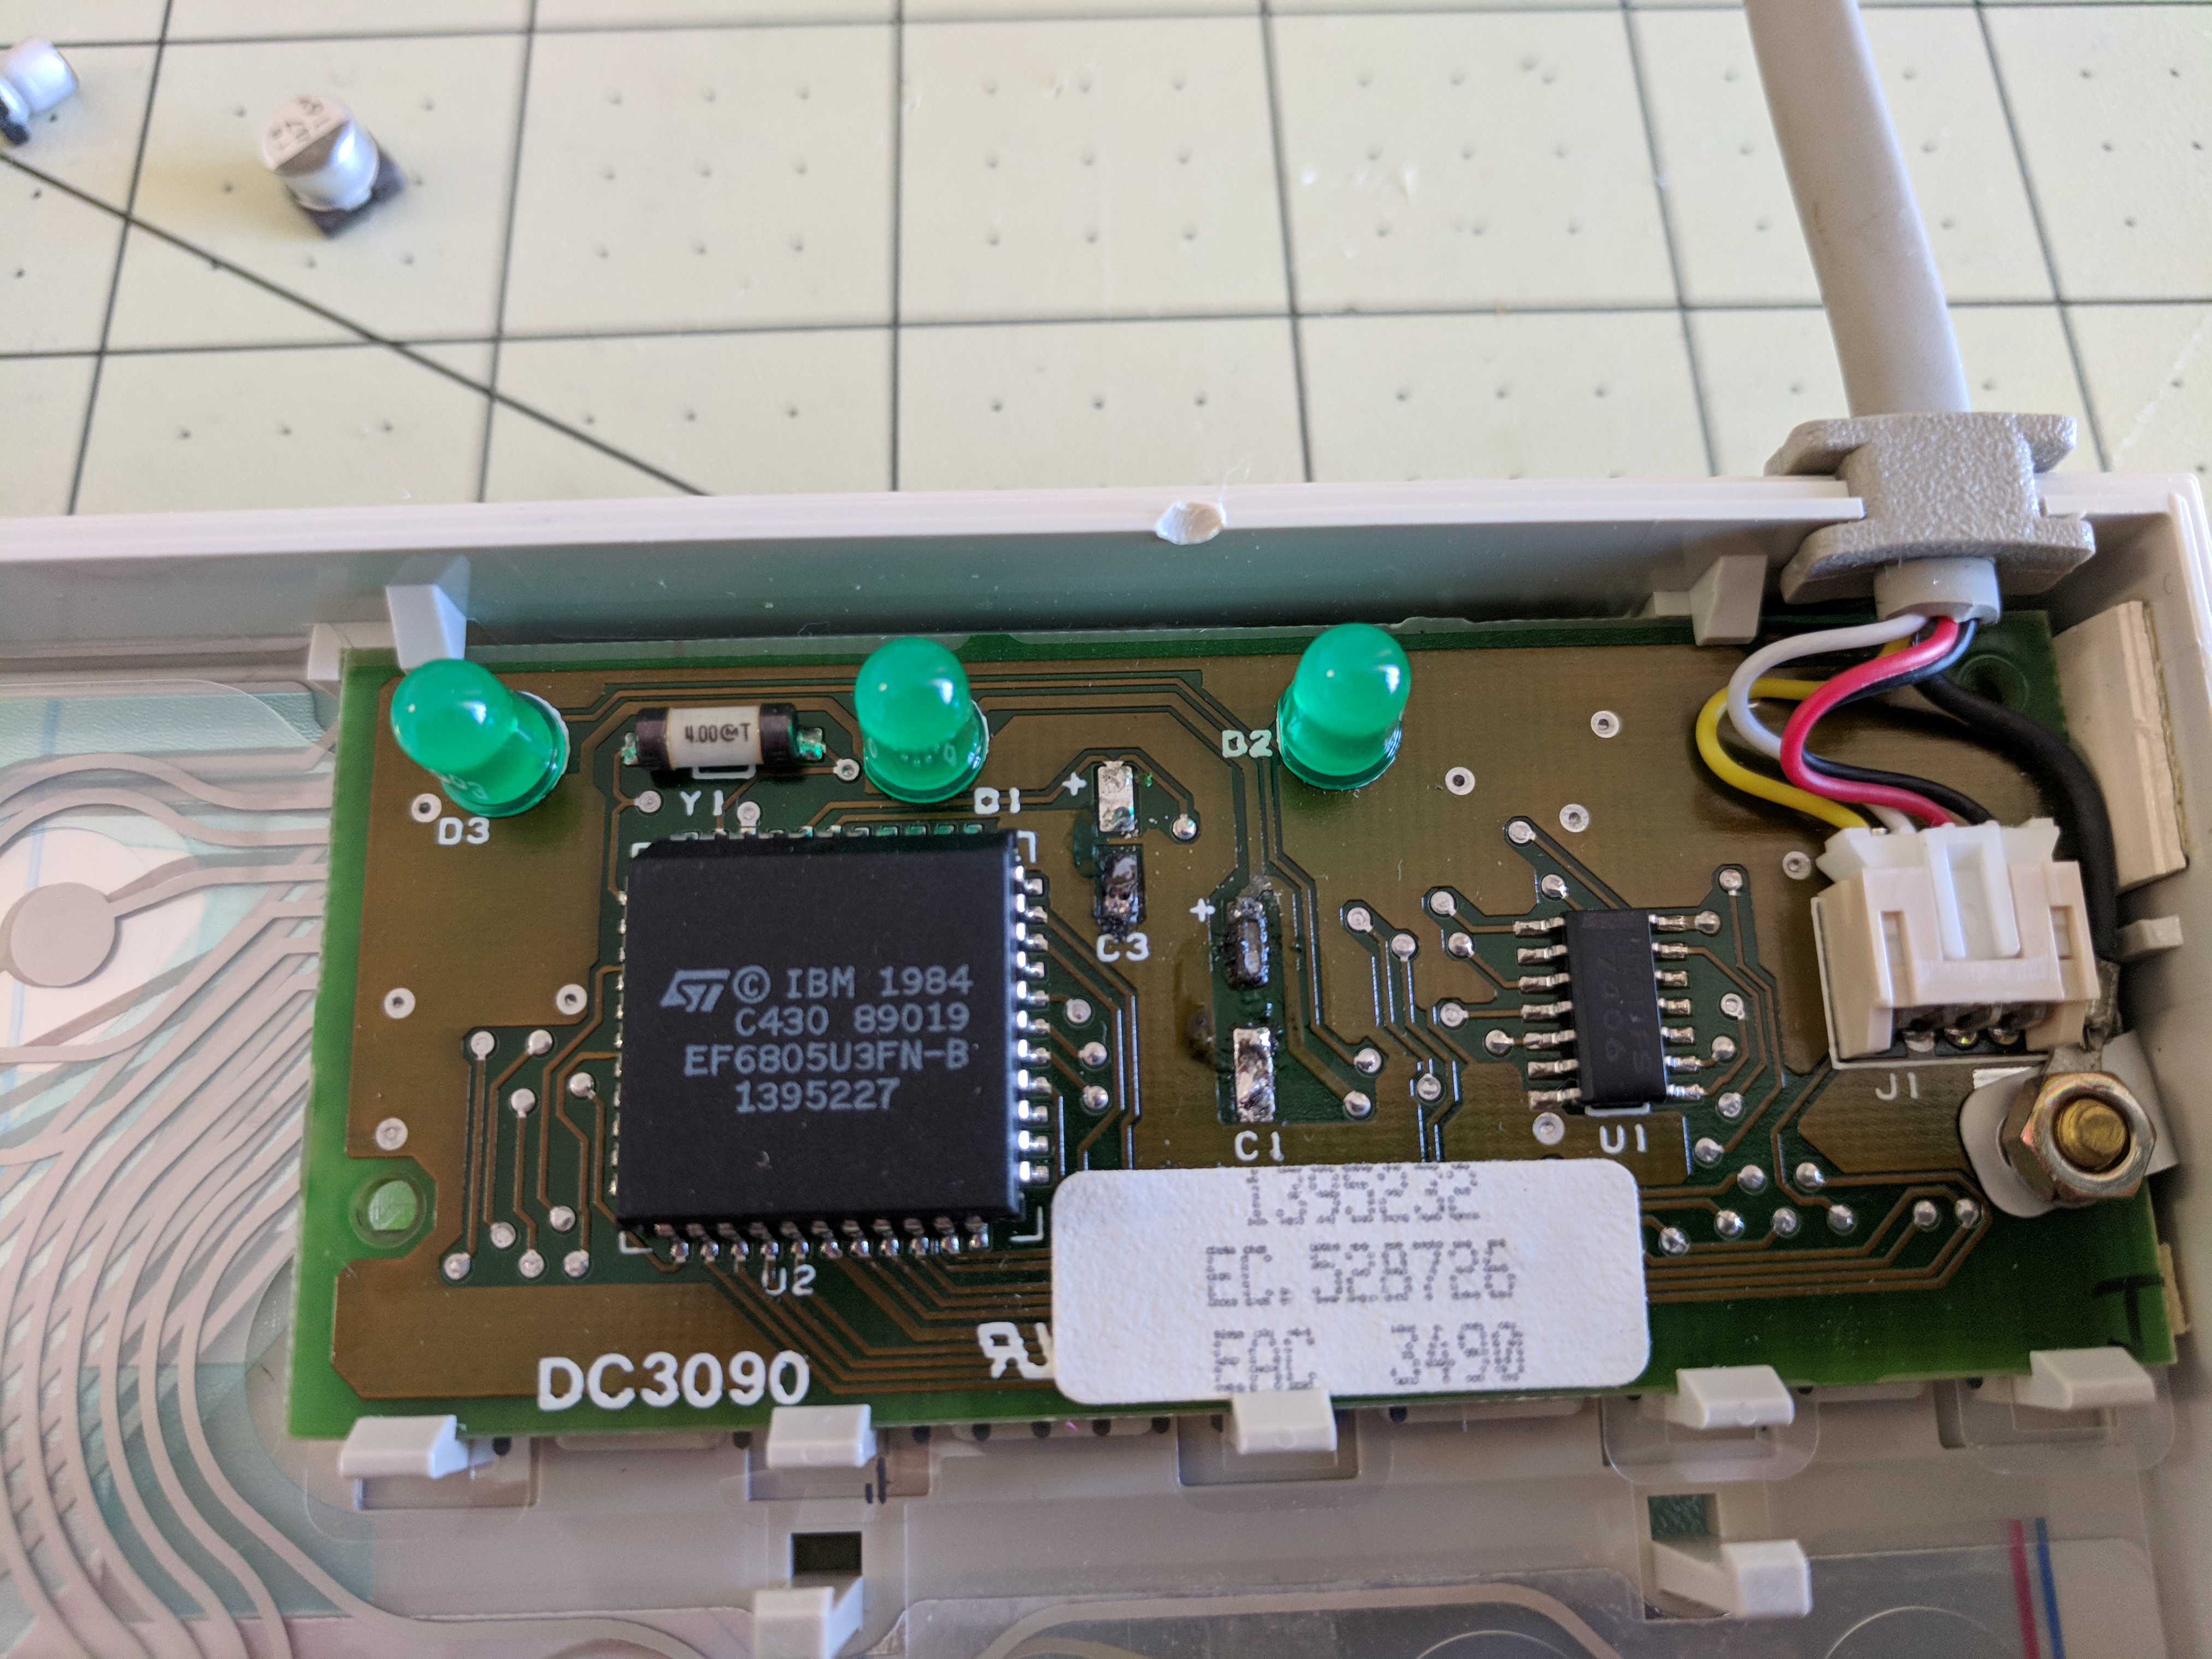
And now the problem capacitors. You can kind of see in this photo that some of the contact pads underneath the capacitor has gone all dark brown, due to the capacitors starting to leak out. After seeing this, I was kind of surprised that the keyboard had worked for the couple weeks I'd been using it so far. I scraped off as much of the dark brown gunk from the solder as I could using my pocket knife, being very, very careful to not scrape any of the surface of the PCB surrounding it. Once I'd got enough of it off that I could see mostly solder, I got out my soldering iron.
You could of course try removing the controller PCB from it's position in the keyboard. As you can see there are several plastic clips holding it in place. It seemed that it would be quite tricky to remove to me, so I decided that I didn't want to risk breaking these clips. These capacitors are surface-mount, not through-hole, so technically there is no actual need to remove the PCB anyway in order to remove them. Plus it's only two capacitors and there is enough of the contact pads visible on each of them that I figured I wouldn't need to apply much heat anyway so there wasn't likely to be any harm caused by doing the whole re-capping with the controller left where it was.
Post-removal, I was left with more of a mess to clean up from all the leaking that had gone on over the years. Unfortunately I also pulled up a bit of the bottom contact pad while removing the smaller capacitor on the left. Whoops. With that in mind, I'm not sure I'm the best person to explain the process of using your soldering iron to remove these capacitors. But if you do still want to know what I did, basically, I just heated up the exposed area of one of the contact pads and gripped the capacitor with a pair of pliers and twisted the side being heated up away after I could see the solder had melted. Then repeated the same process for the other side. I think my problem was that I tried twisting the capacitor too soon when the solder wasn't melted yet, so twisting the capacitor away just ended up ripping up the contact pad in the process.
I used 99% alcohol and Q-tips to clean up the remaining gunk from the leaking old capacitors. I initially used my pocket knife to scrape up some hard bits without really thinking about it and ended up scratching a bit of the PCB. Dumb, dumb, dumb! Thankfully I didn't end up cutting a trace or anything. After this close-call I decided to just use my fingernail to scrape off the remaining bits of hardened gunk.
The replacement capacitors needed are a 2.2µF 50V and a 47µF 16V. You can of course go higher with the voltage, but should definitely keep the capacitance the same in any replacements you decide to use. Specifically, I used these two capacitors that I got from DigiKey.

I placed little squares of electrical tape down as a precaution. I wasn't sure if the capacitors would get pushed down and by how much (potentially putting the side of them in contact with the PCB) once the top of the keyboard was placed back on. Maybe it wasn't needed. Also, certainly anyone could do a better job of soldering then I did here, heh.
Before reassembling, it's important to test this out and see if the new capacitors are doing the trick. I took the keyboard over to my computer, plugged it in and powered it on and voila, no more stuck LEDs after a cold boot (without my previous unplugging and replugging it in trick)!
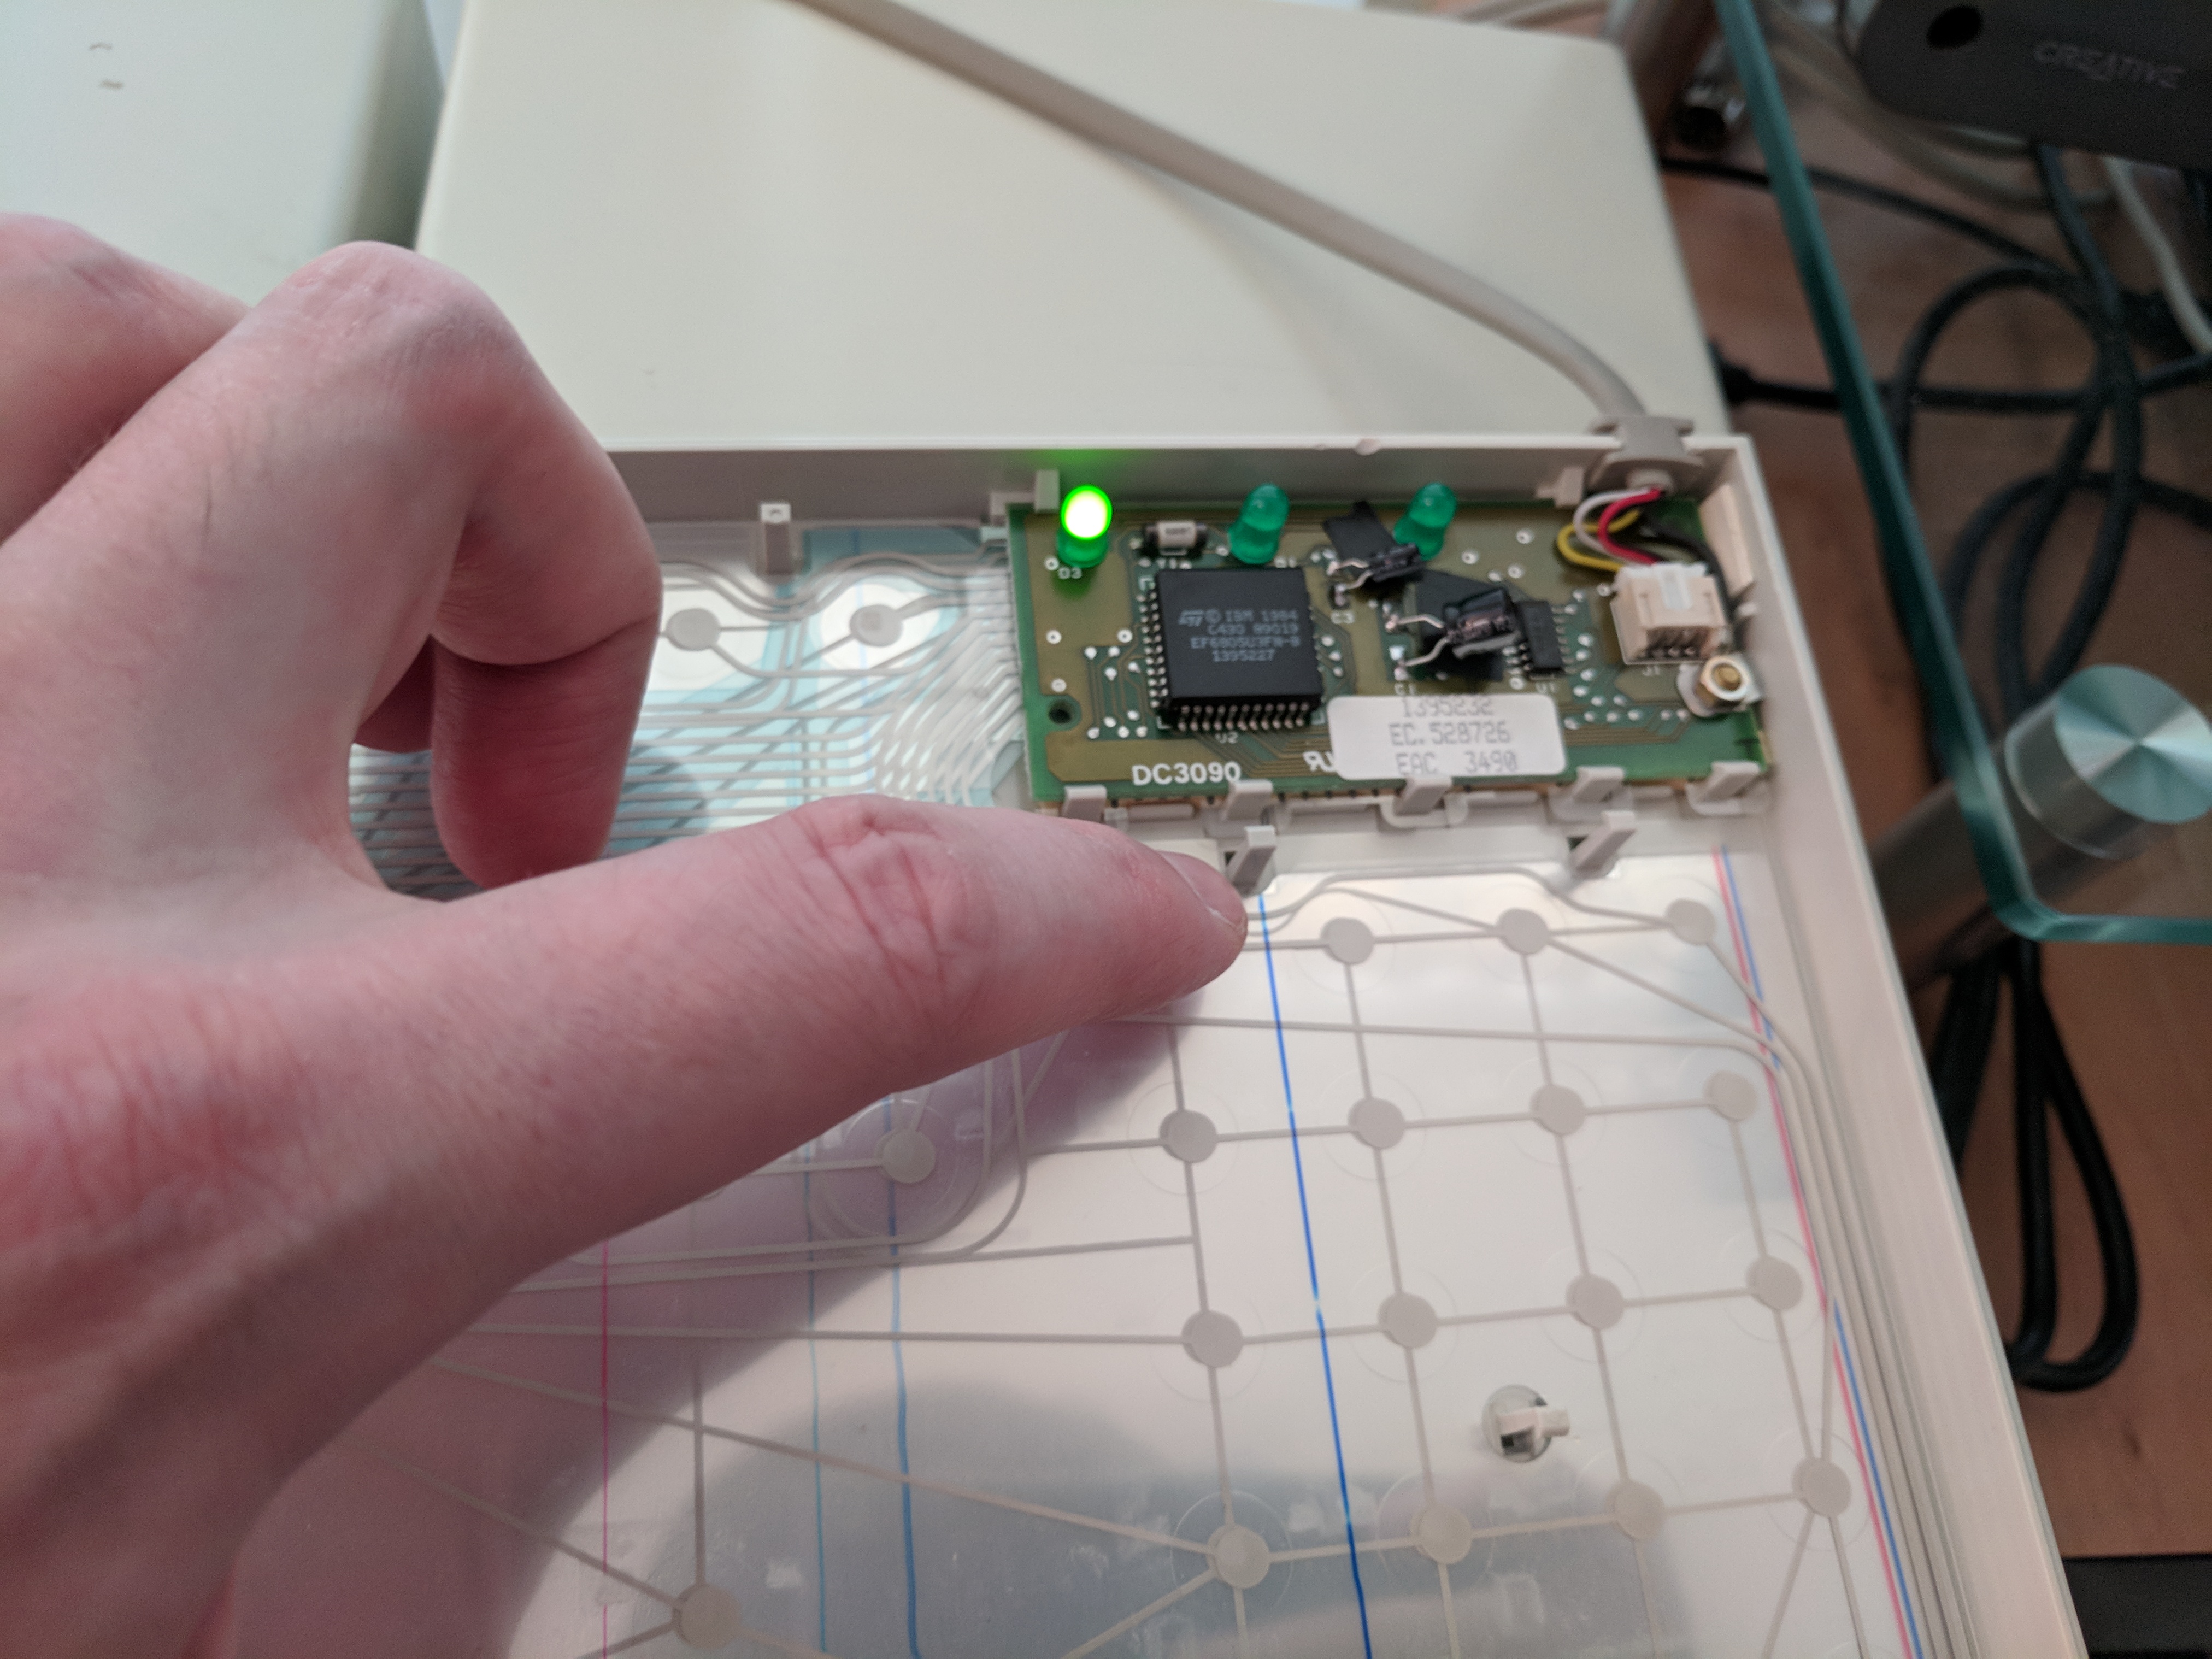
You can simply tap your finger on the membrane to test keys. I tested a bunch this way to make sure that everything was working fine.
At this point, it had been over an hour because I am kind of slow with these things. So it was about time to clean up all the keycaps and the top plastic cover of the keyboard. Once this is done, I set them all out, face up, on a towel and let them dry for a few hours. I actually used my DataVac Electric Blower Duster to dry off the top cover quicker as I wanted to get on with the reassembly sooner. But I did leave the keycaps to dry on their own for a few hours in the meantime.
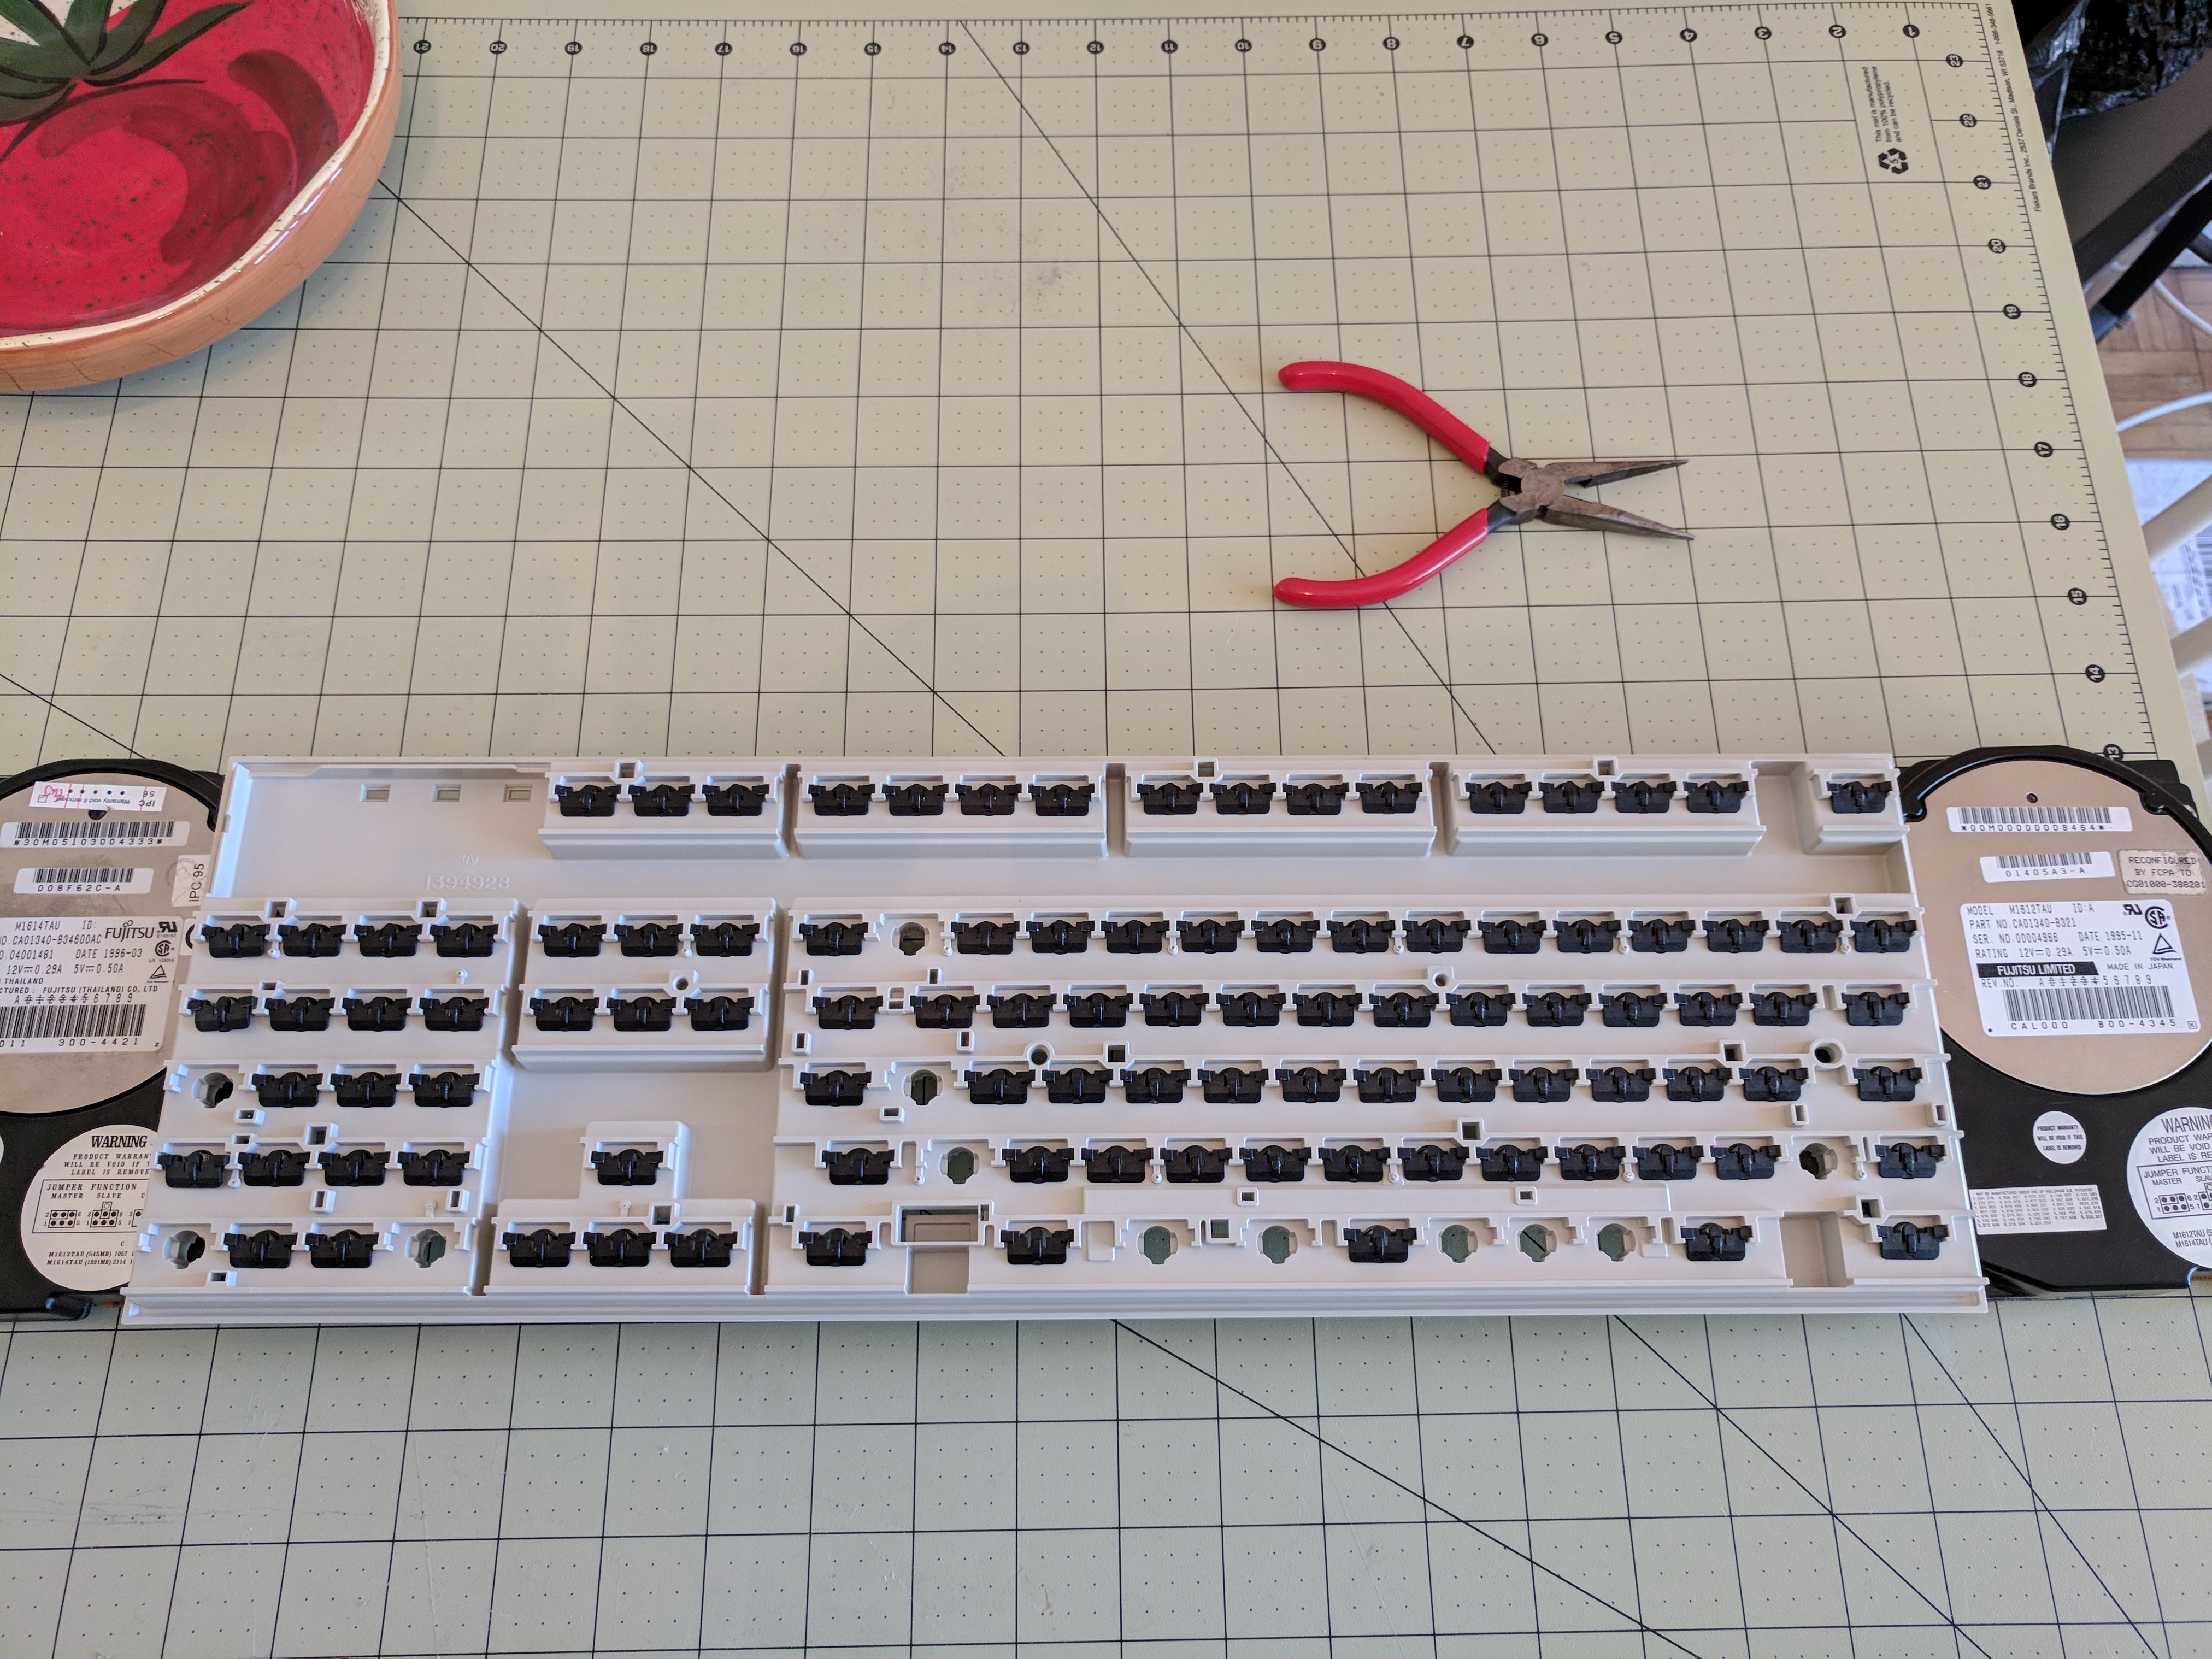
To replace the buckling springs, you need to take the top plastic half of the keyboard and set it upside down, but with something to mount it up a bit higher. This is because when the springs are placed inside, the top of the spring will dangle slightly past the top of the plastic cover. So if you had it just resting flat on some surface you would not be able to correctly and fully insert each spring into it's little bracket. As you can see here, I'm using two hard disks on either side (because they were the only really suitable thing within reach as I sat down to do this, heh) to mount it a bit higher.
Then, using your previously taken picture of the top of the keyboard before you took it all apart, re-insert each spring into it's bracket, leaving the correct few spaces empty. It is absolutely important that each spring fits snugly into it's bracket on the keyboard cover. However, there's nothing to hold them in place other than gravity, so just be careful. When you're done this process do a quick once-over to ensure that they are all snugly in place. Trust me on this!

Now take the thin black sheet/mat that we removed and set aside before. Place it over top of the springs. Each of the holes in the sheet should line up with the various holes for the clips and two screws on the plastic cover. Unfortunately there is nothing to hold this in place.
And now is probably the worst part. We need to take the bottom half of the keyboard (that has the membranes and controller PCB in it) and place it on top of the top half of the keyboard with the springs in it. AND we need to do it while it's mounted slightly off the ground as we have had it thus far. This is incredibly important as otherwise the springs will pop out of place. In my case, holding the bottom half of the keyboard upside down did not result in the membranes falling out, but I would guess if that happens to you that you could use some small bits of tape to hold it in place. In my case, the black sheet would not stay in the bottom half of the keyboard while held upside-down so pre-placing it on the top half as shown in the above picture worked best for me.
Carefully hold the bottom half of the keyboard over top of the top half, lining it up while being careful not to accidentally shift the top half off of it's two supporting mounts and then set it down, pushing it together. DO NOT pick up the whole thing to attach the two plastic halves together You definitely want to leave the top half with the springs in it resting on your two mounts throughout the entire process. Go around all the edges and use your hands to squeeze all the edges together and you should hear all the plastic clips clip into place. If you pick it up (even slightly) to do this, you risk the springs falling out of place!
Apparently this exact problem happened to me with exactly one spring. Once I had reattached all the keycaps I was testing all the keys and noticed that the 'W' key didn't work unless pressed "just so." Taking off the keycaps again, I took a flashlight and looked down at the feet of the buckling springs.
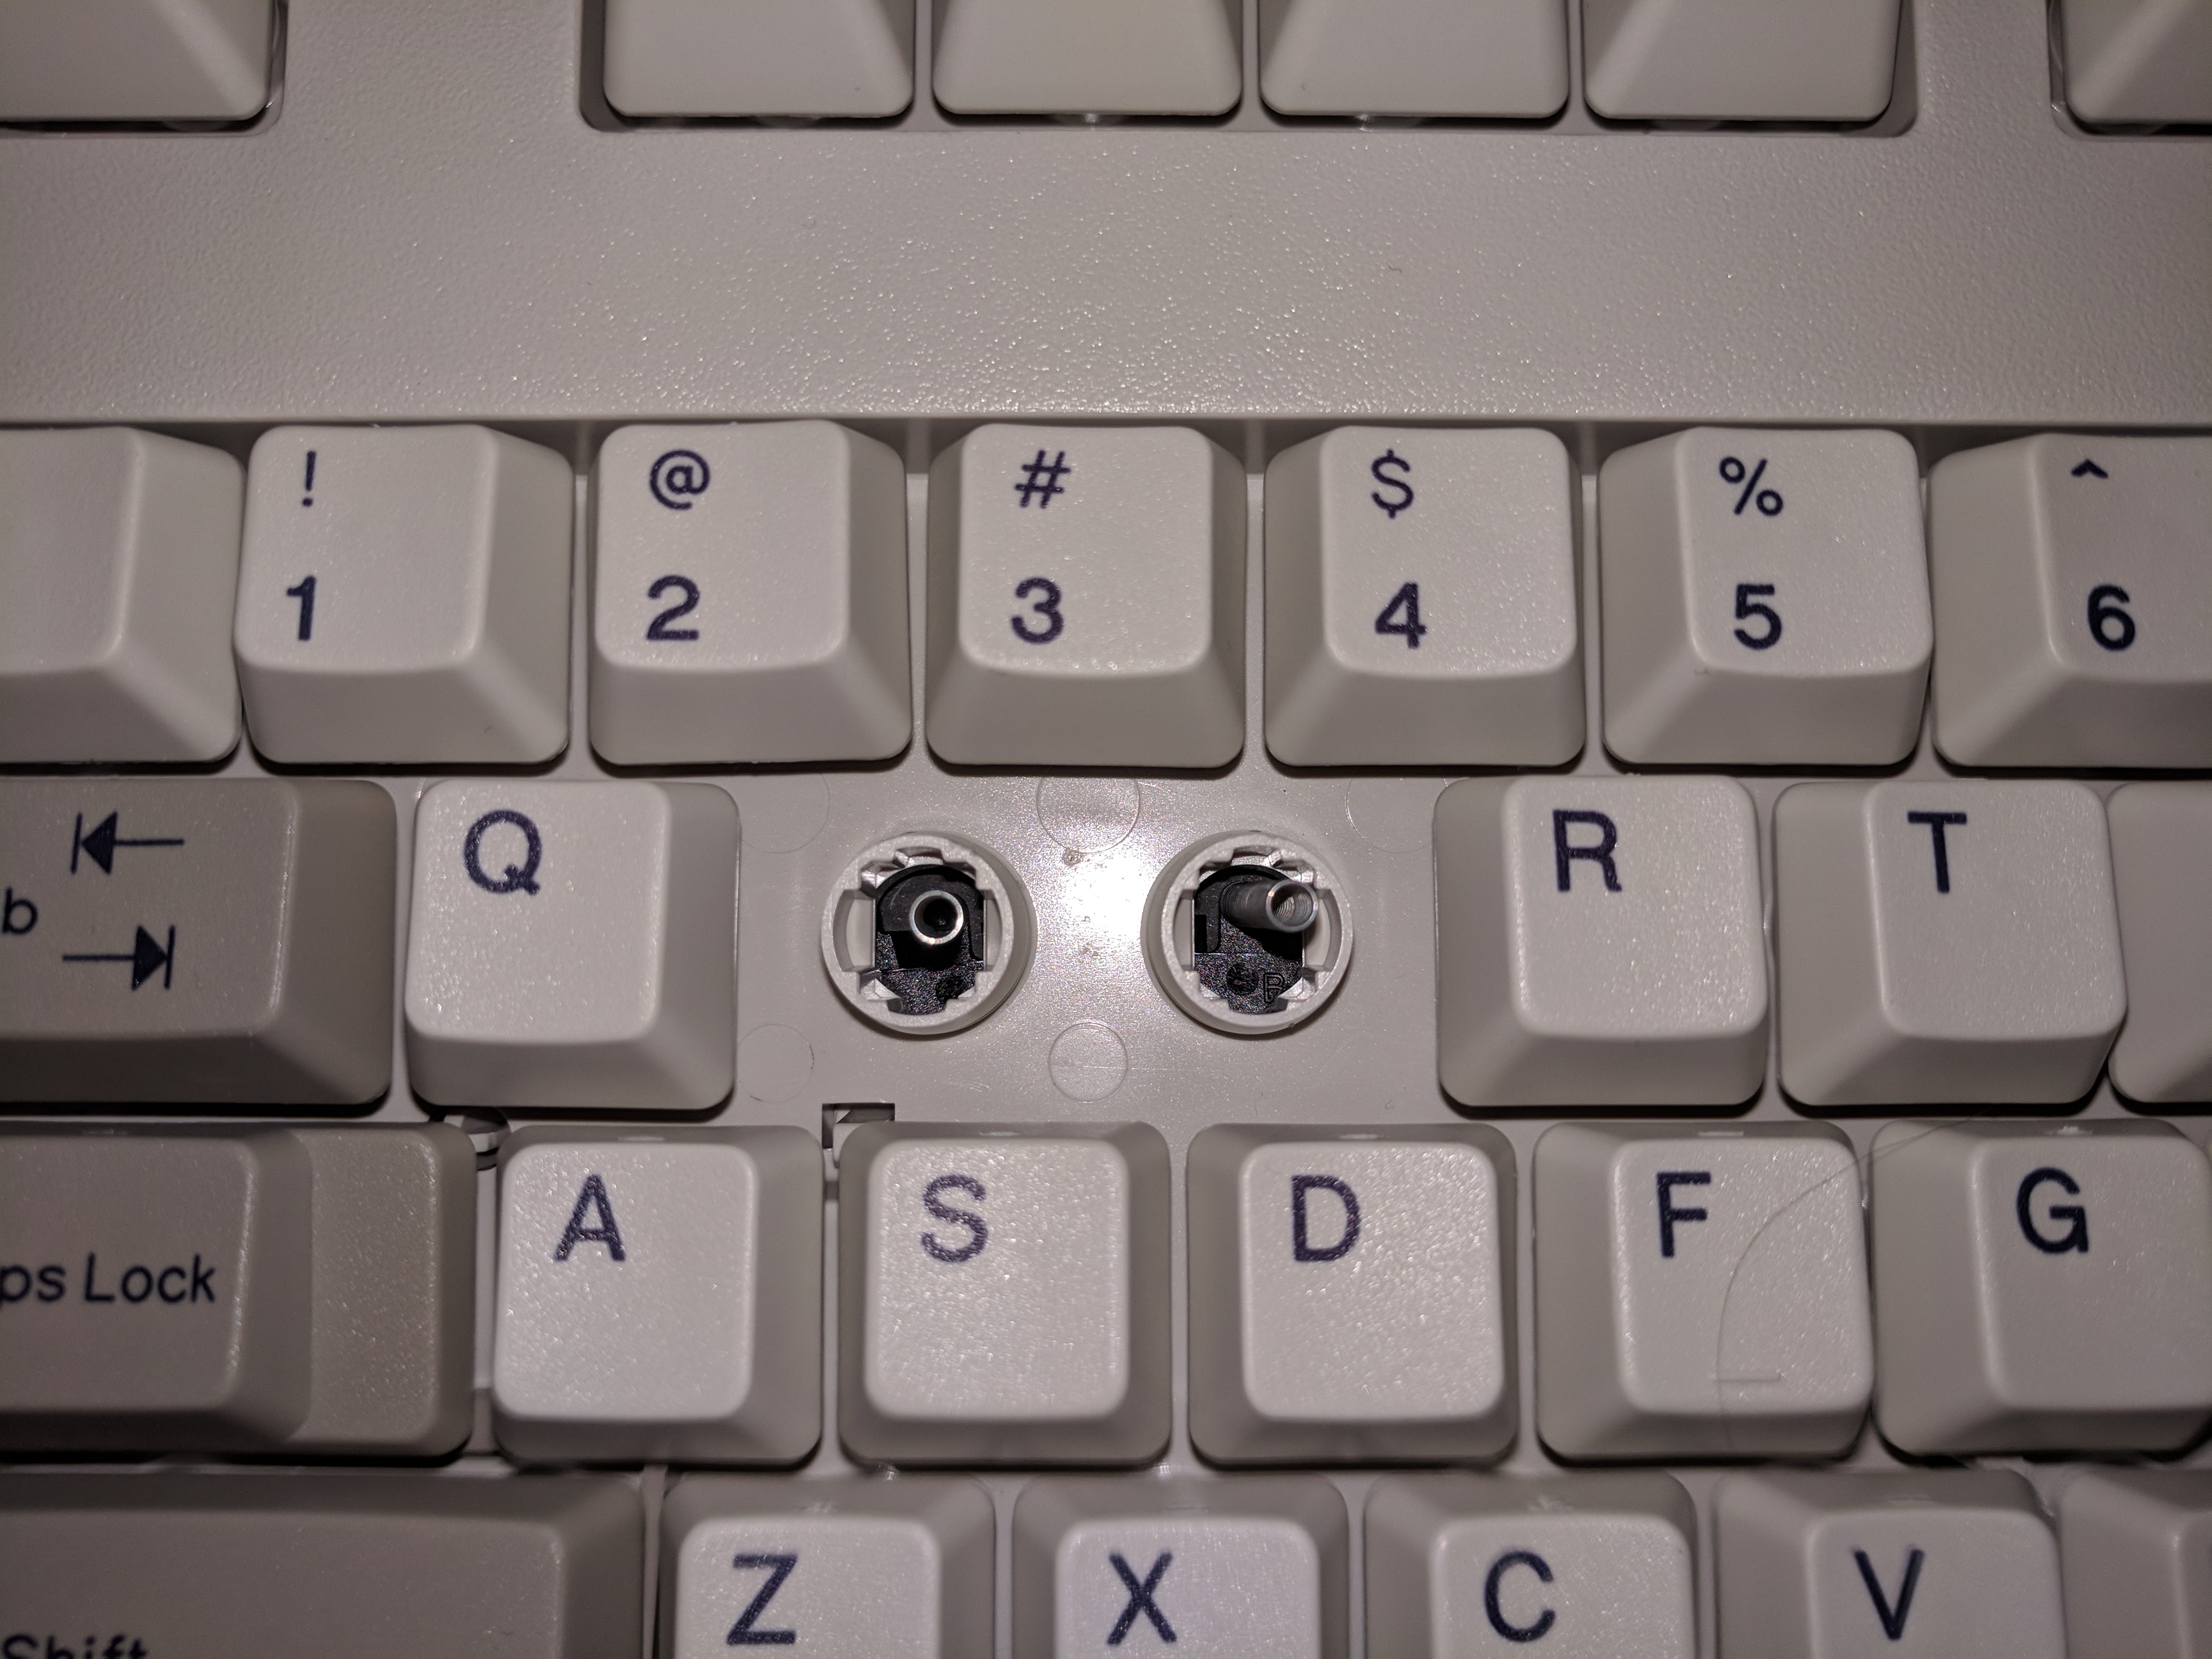
It's maybe a bit hard to see in this picture, but the black feet of the spring for the 'W' key is very slightly crooked. The foot on the left side had somehow shifted out of place during reassembly and was outside of the plastic bracket that it should be sitting in. This was resulting in the key not pressing correctly (even though the sound of it pressing was just the same as every other key that worked fine). The fix for this was to take it all apart again and reassemble it. Not fun. So, be very, very careful when reattaching the bottom half of the keyboard to the top half with the springs in it! Take your time with it.
Once you've got that done, reattaching the keycaps is easy. Start with the spacebar and then do all the longer keys. Leave the simple square keys to the end as they are the most straightforward.
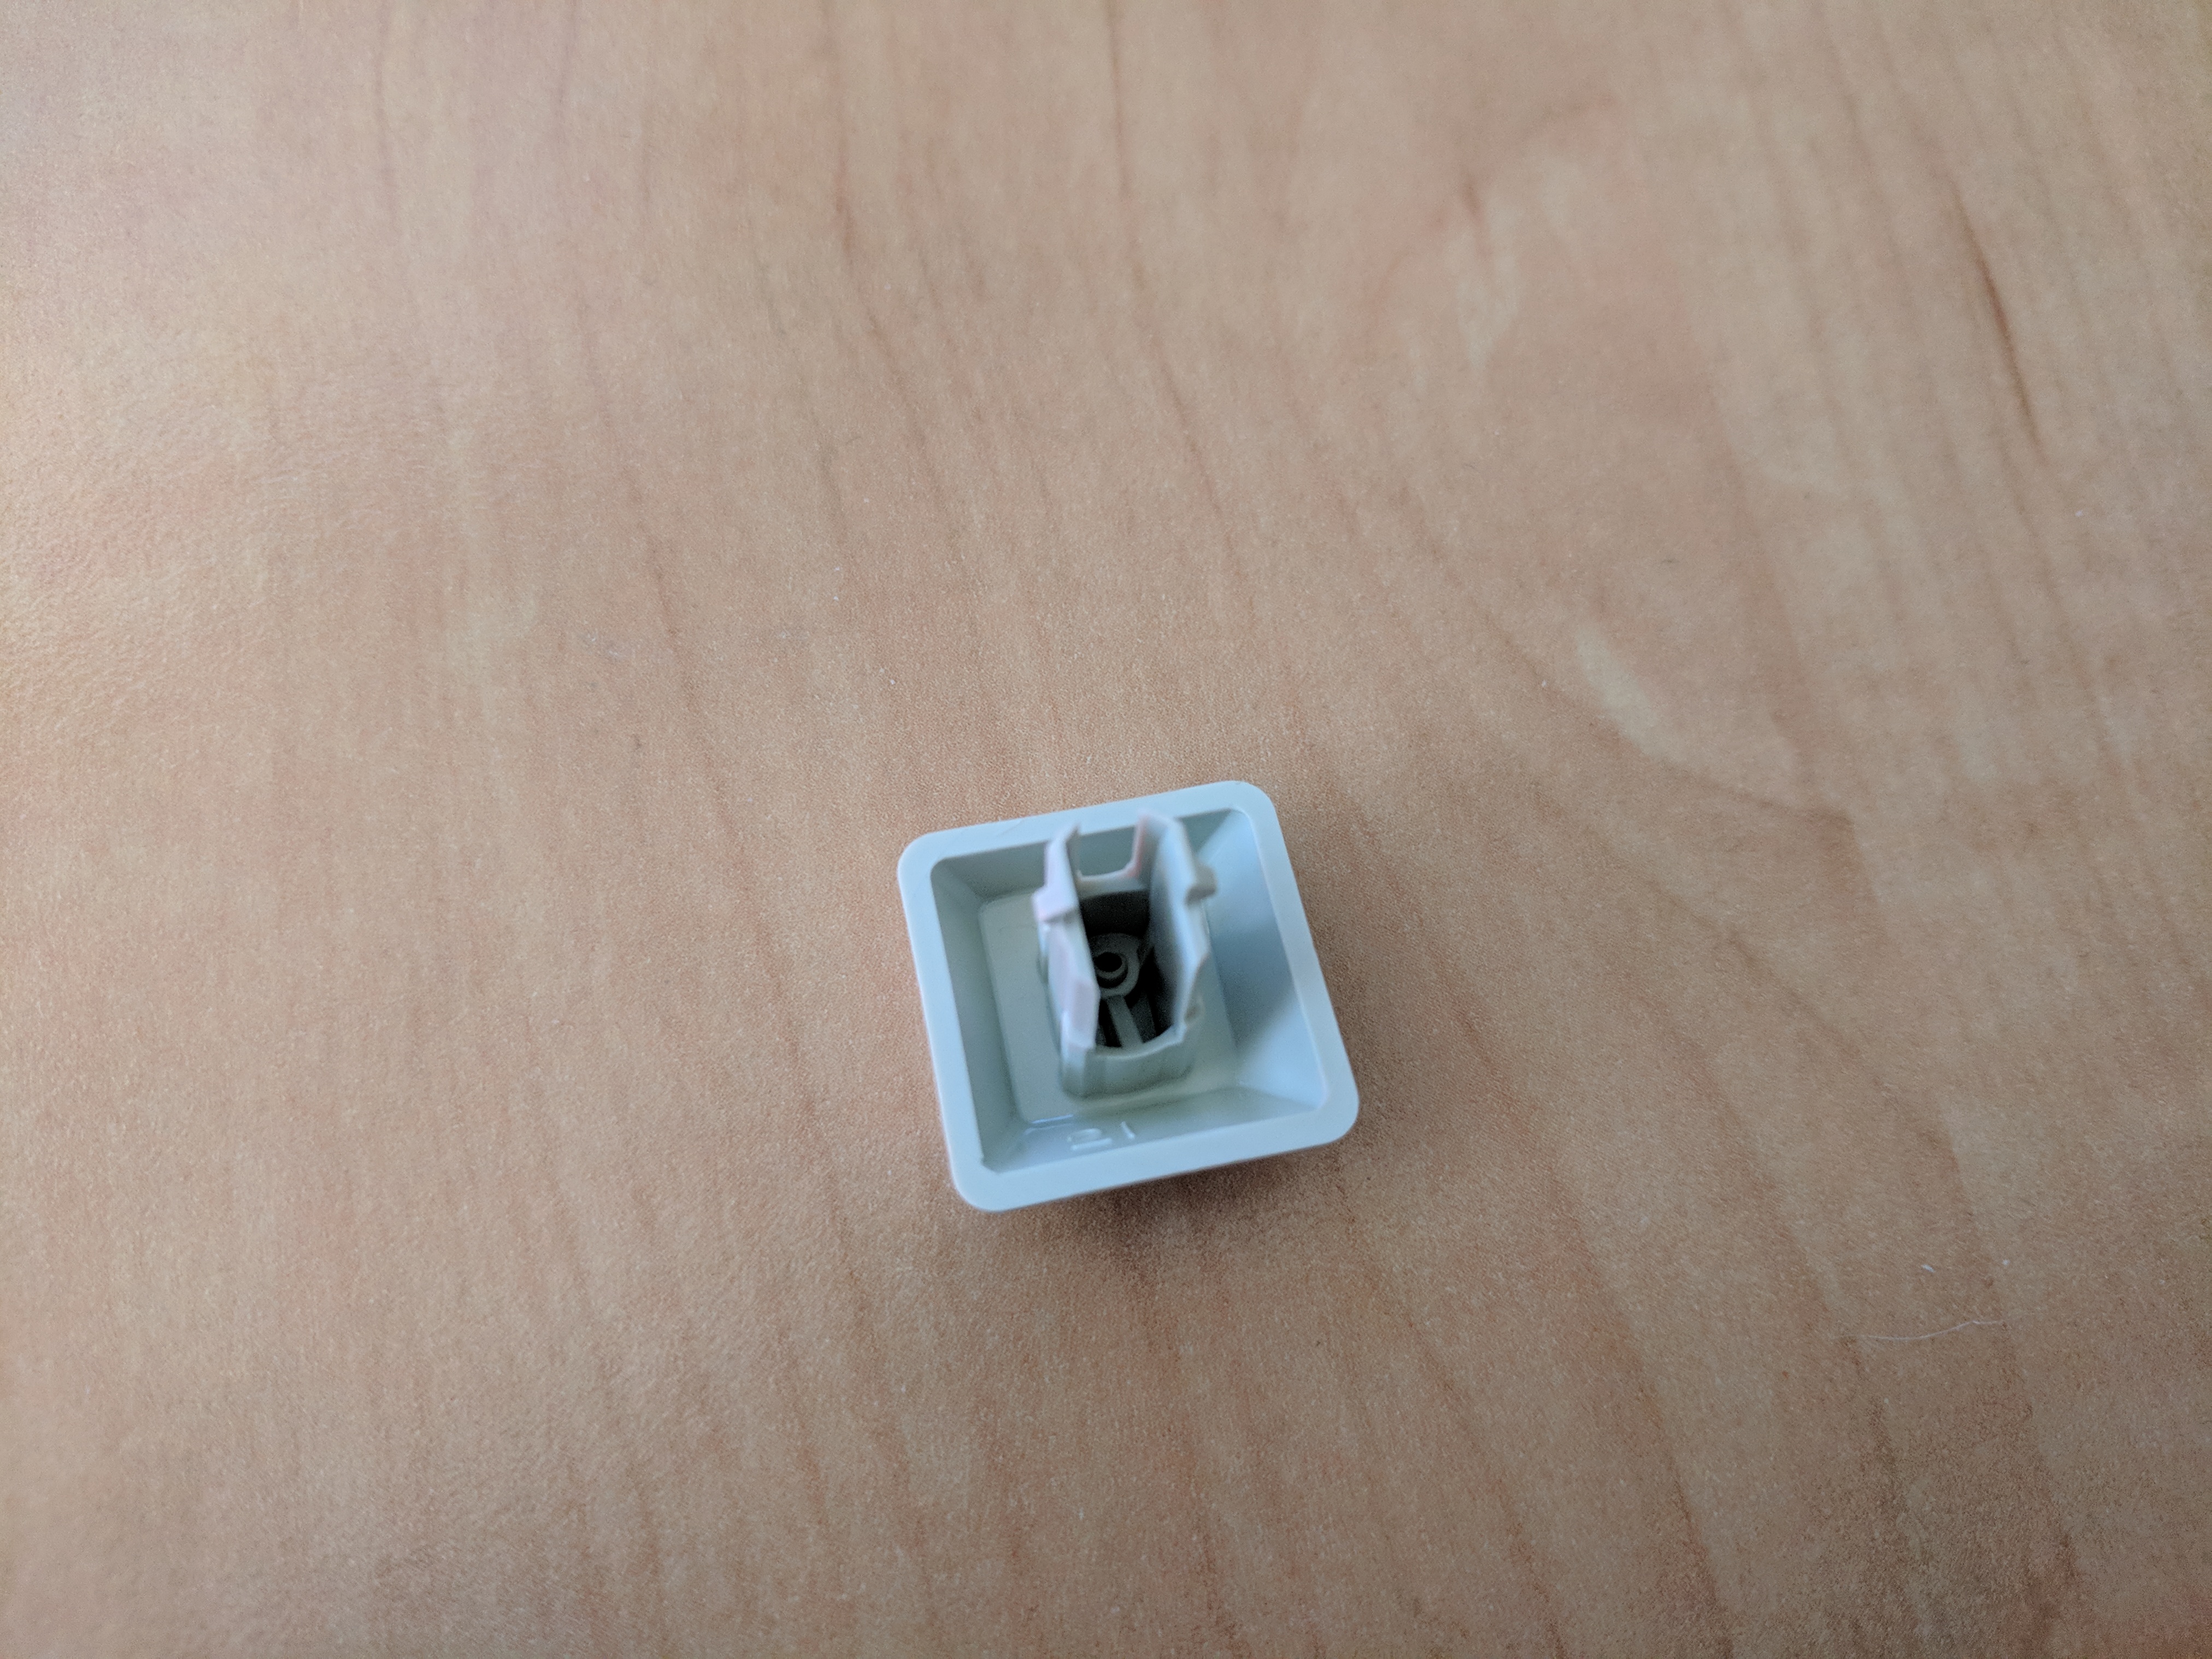
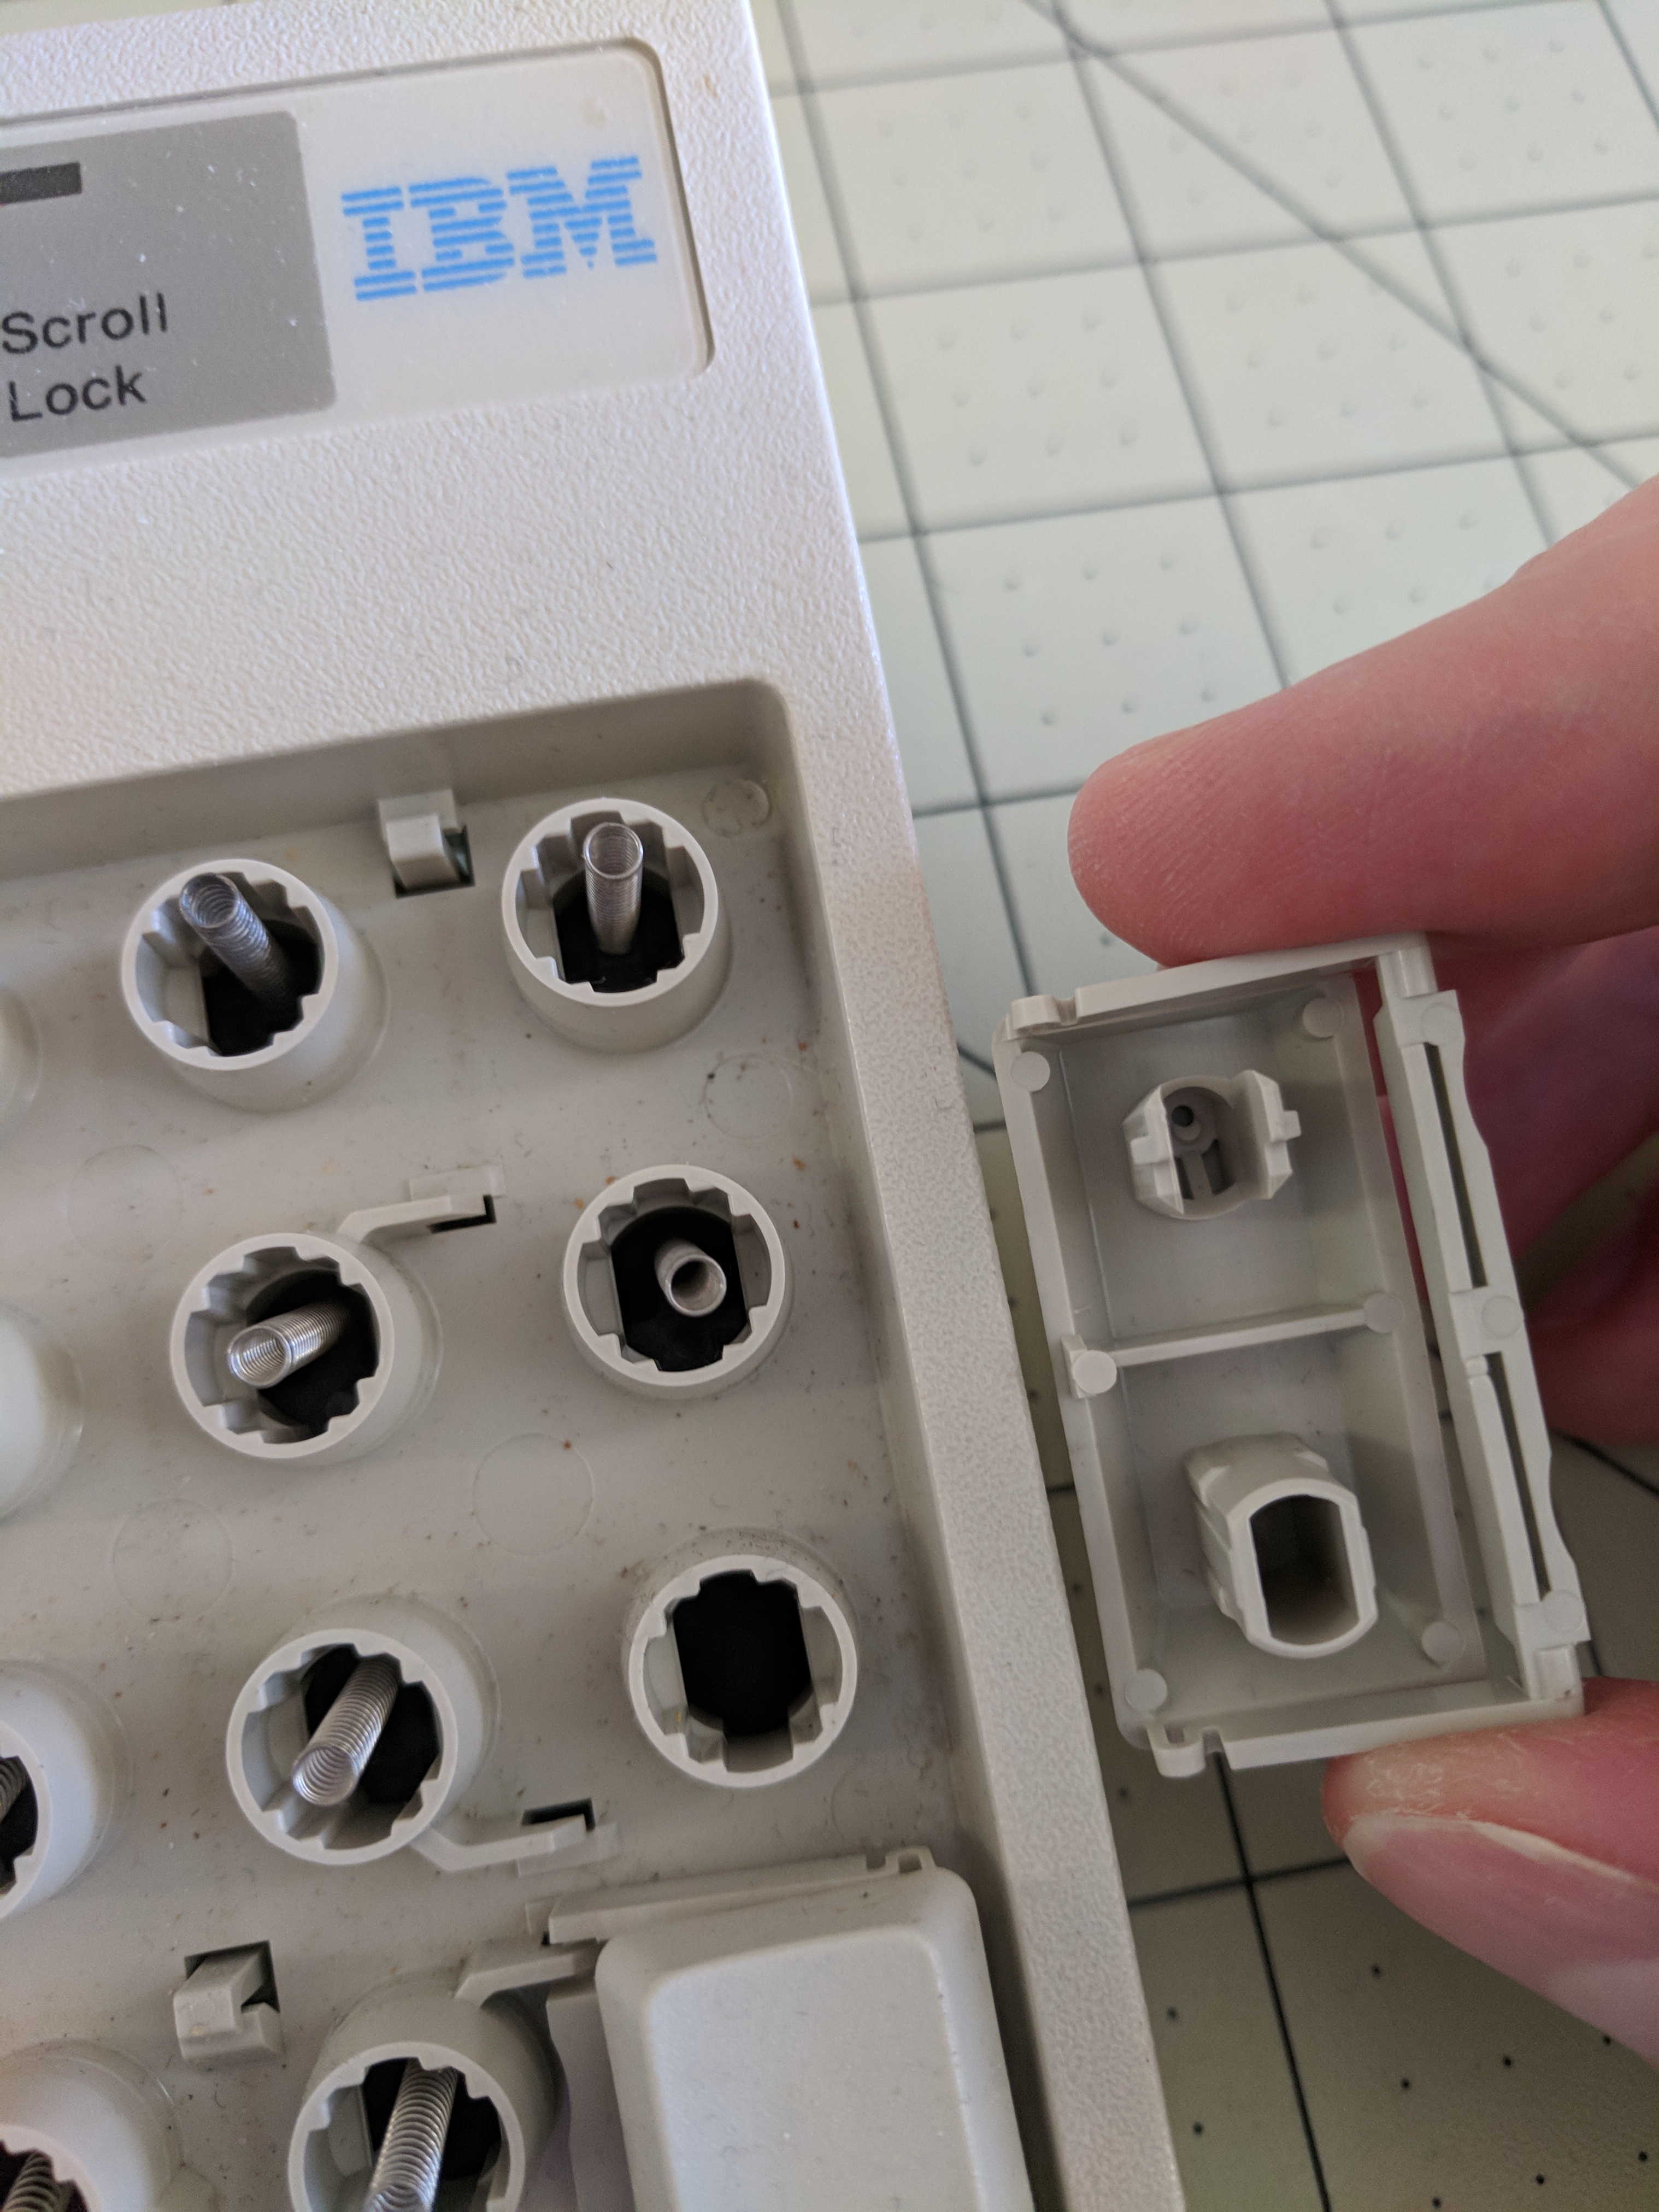
With every keycap, the goal is to have the top of the spring resting in the middle of the underside of the keycap. As you can see in the photo on the left, there is a small round slightly raised piece of plastic inside the bottom of the grove in the middle of the keycap. The top of the spring when inserted correctly will rest perfectly around that small round piece of plastic.
What is somewhat likely to happen when you're replacing the keycaps is that the spring gets caught on the open flat area at the top of the grove, or it ends up resting somewhere on the little plastic ramp thingy on the other side. If this happens you need to pop off the keycap and try it again. You'll know when you got it correct when you're able to press the key down and it makes the very same clicky sound as it did before you took it off in the first place. It it feels too mushy and, most importantly, does not make that clicky sound then the spring is not in the correct position. If you're not sure if it's making the correct clicky sound, assume that it's not correct and try again. If you're still not sure, try replacing a few other keycaps and compare the sounds.
Most of the longer keys have more than one grove. The grove that the spring goes in is always the one that has the top/bottom of the plastic cut away, as you can see in the photo on the right. I had a lot of trouble getting the number pad '+' and Enter keys on correctly. The springs just kept not sitting right when I popped the keycap back on. What ended up working for me was to tip the keyboard up, so it was resting on the top edge (IBM logo down), forcing the spring to be naturally a little lower (due to gravity) as I was inserting the keycap.
As you're replacing the longer keys with the bar/bracket thingy, use a tool to push the bar down slightly (and very carefully, you don't want to push it too much and break it!) so it fits under the clamps.
Finally, remember to replace the two screws on the bottom.
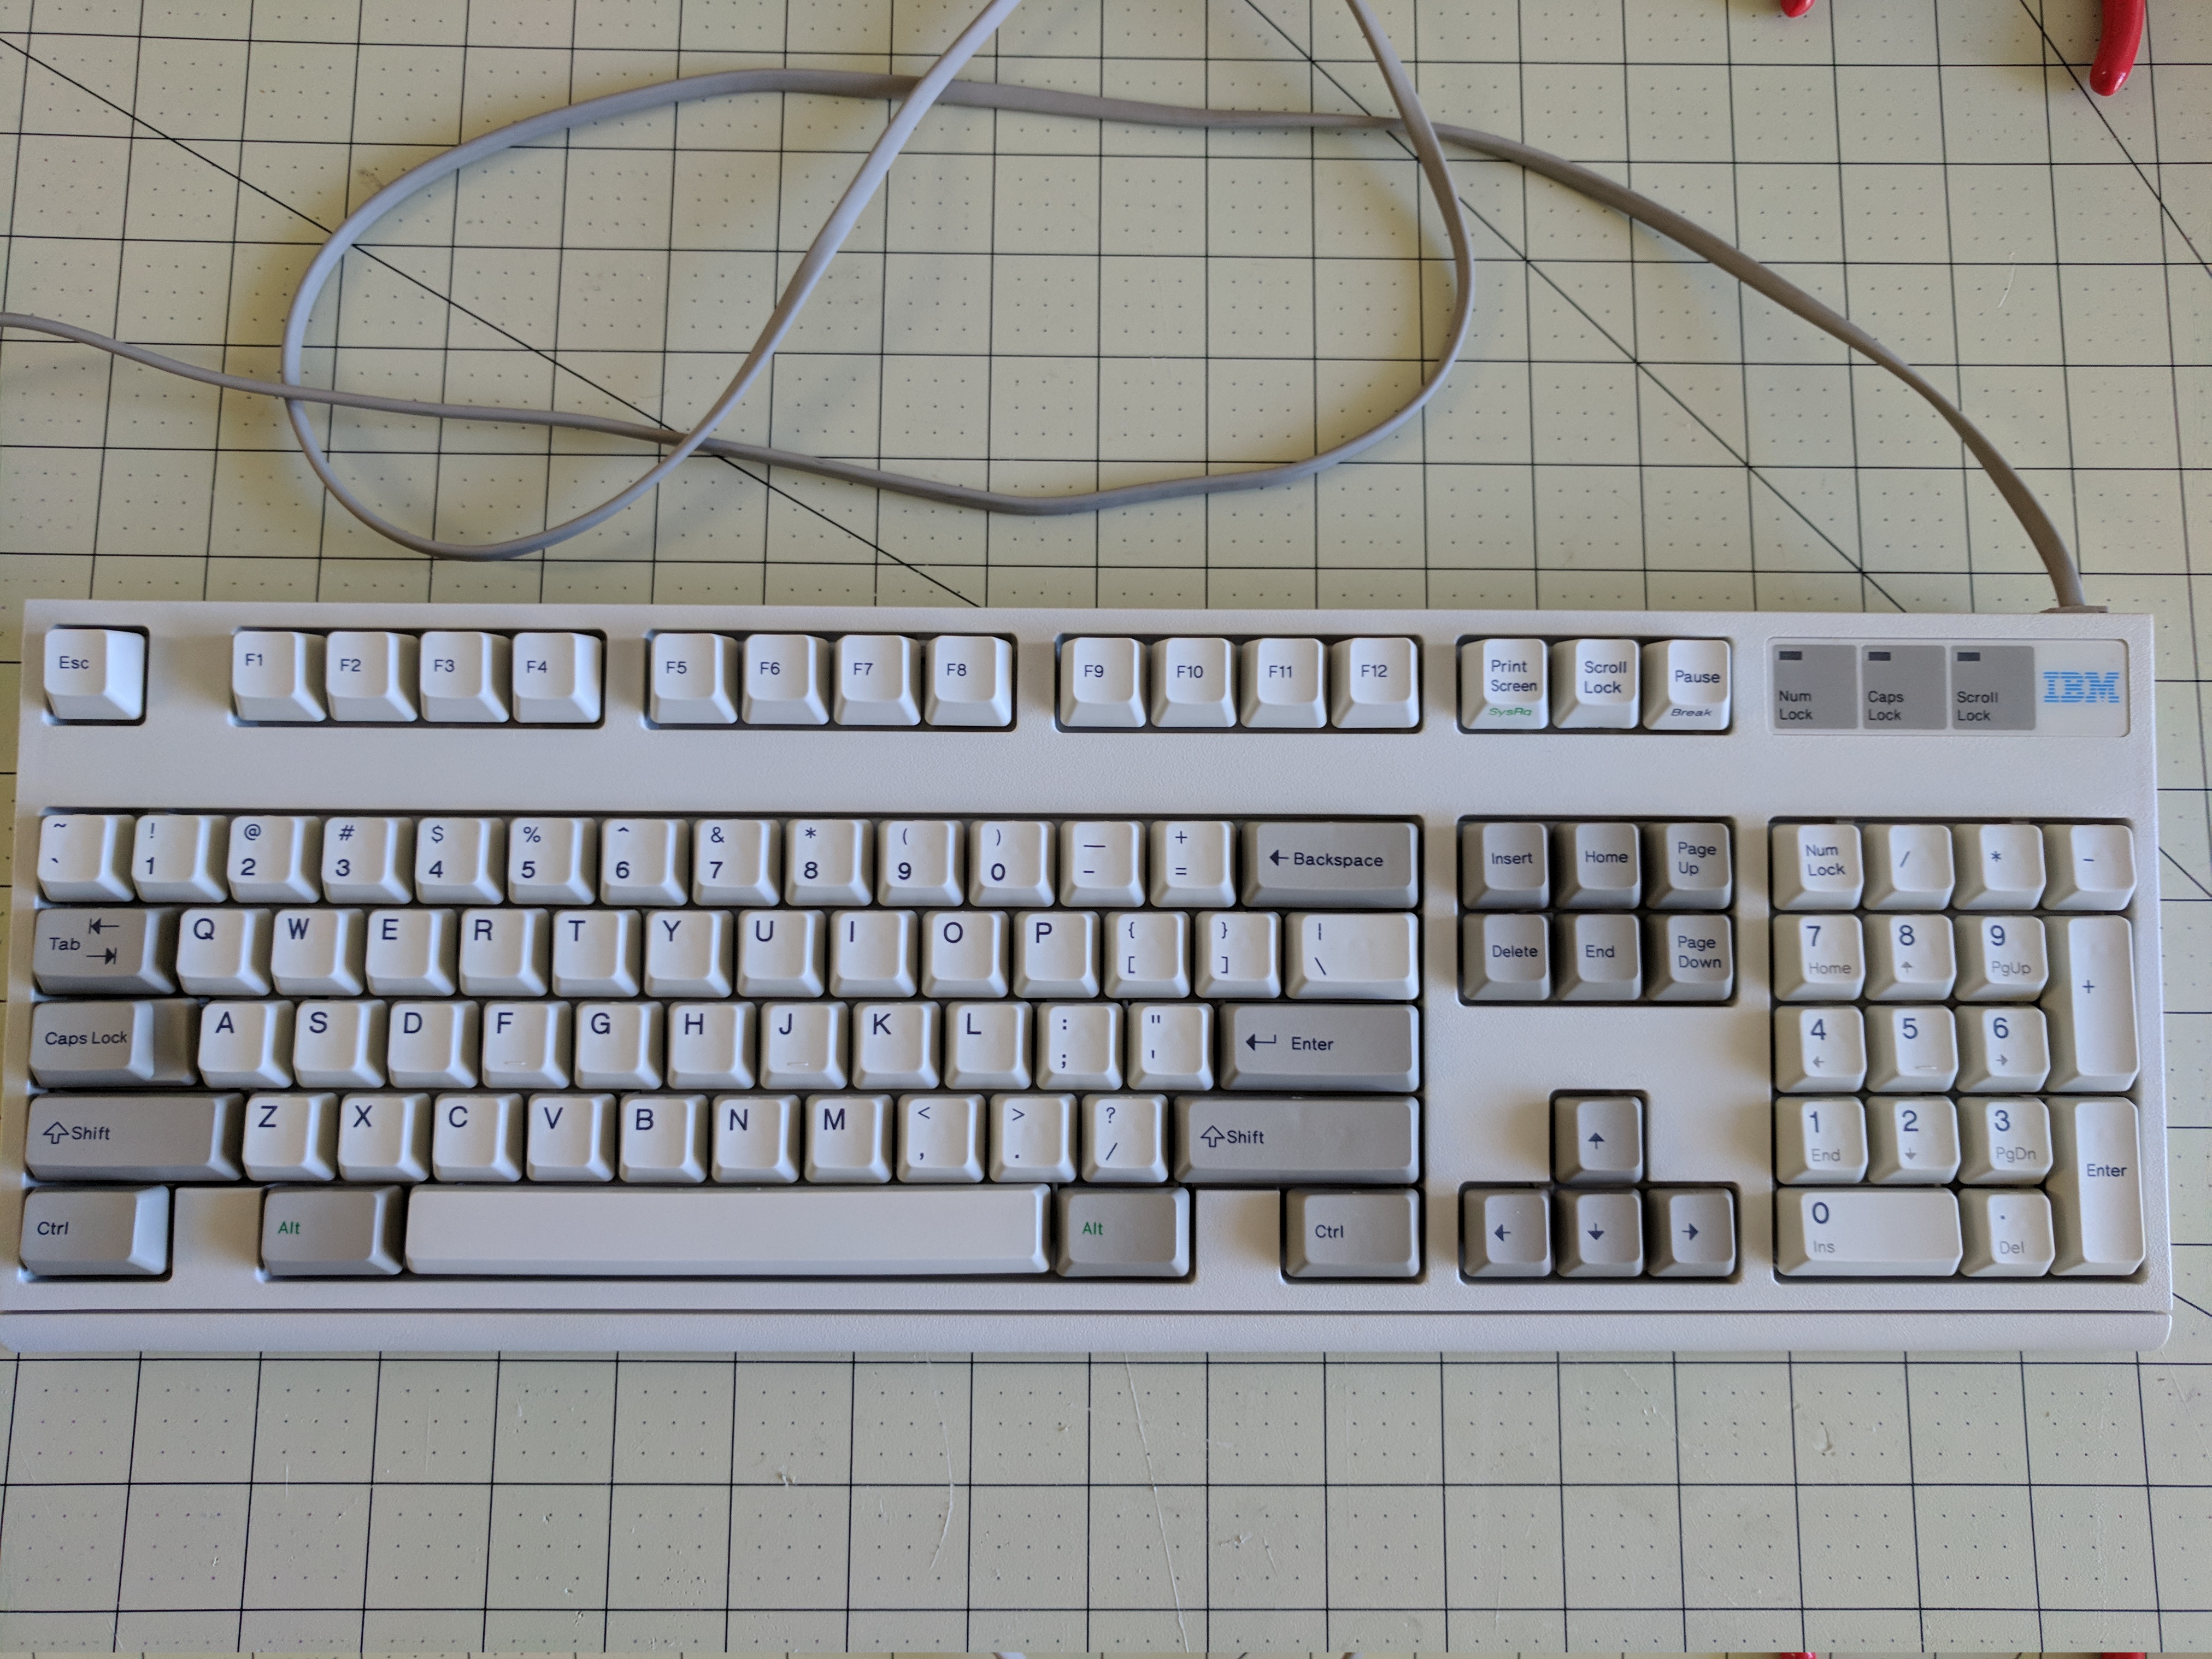
Heh, you probably can't even tell at a casual glance that that is a different photo then the first one I posted because the keyboard was relatively clean to begin with. This photo is definitely post-cleaning-and-fixing!
And that's pretty much it! I hope this helps someone out there. There are a number of guides to repairing and disassembling/reassembling the Model M2 keyboard that other people have written over the years but I always felt like there was some details missing, particularly with regard to disassembling. I wrote this post thinking about what details I would have loved to have going into this. It ended up being quite wordy, but well, sometimes (often) more details are better!